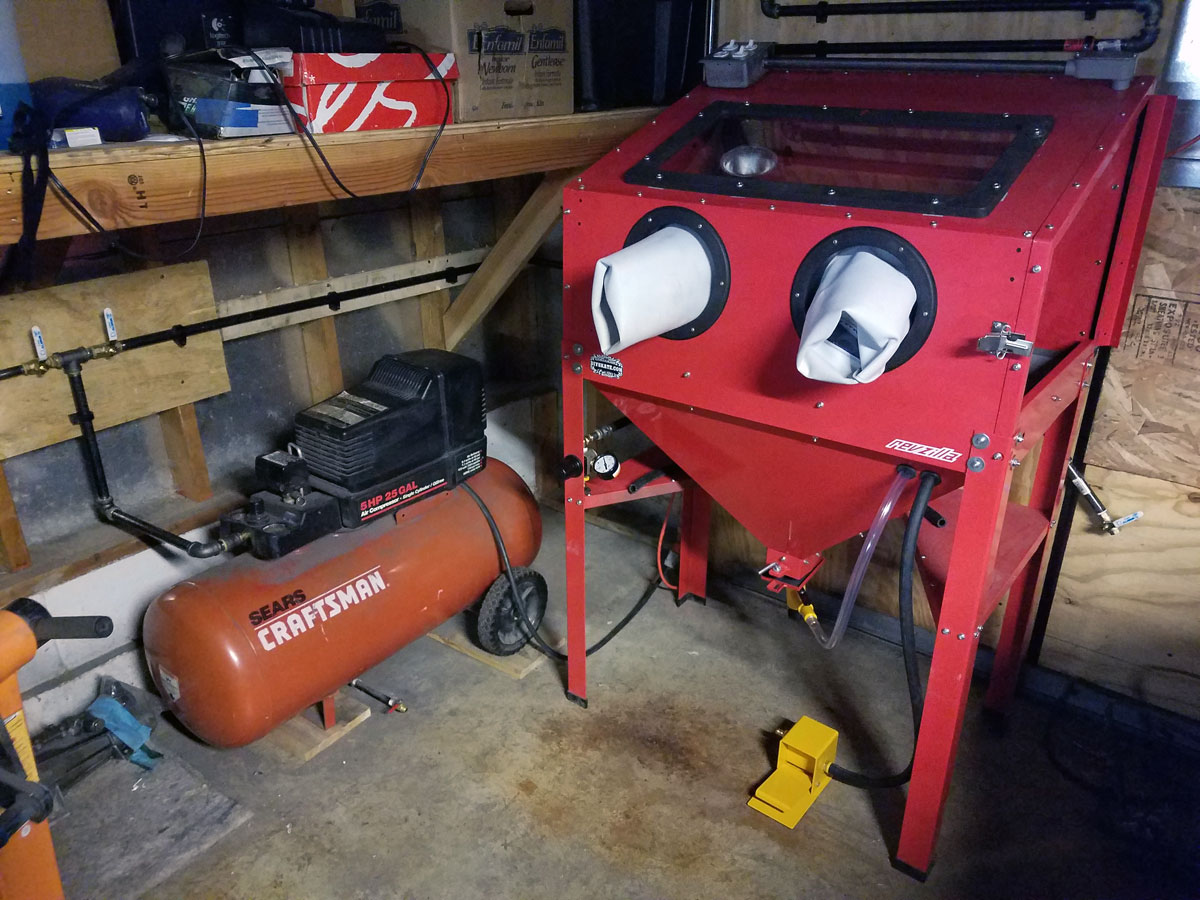
Using the wire wheel to clean rusted parts, especially intricate parts, sucks. So I did a ton of research and came across a small company out of Washington state that carried kits to upgrade cheap sandblast cabinets like mine and turn them into legitimate workhorses. These kits weren’t exactly inexpensive, but I decided it was worth it and could finally afford it.
I also had to completely rebuild the cabinet from scratch and run all new steel lines to really get the most out of it. But in conjunction with the upgrade kit I just bought, it turned a barely functioning sandblast cabinet into something that rivaled much more expensive professional units.
The undersized air compressor was the only weak link now. But it’s already too much of a draw on my electrical in this garage, so I’ll have to address that at a later date.
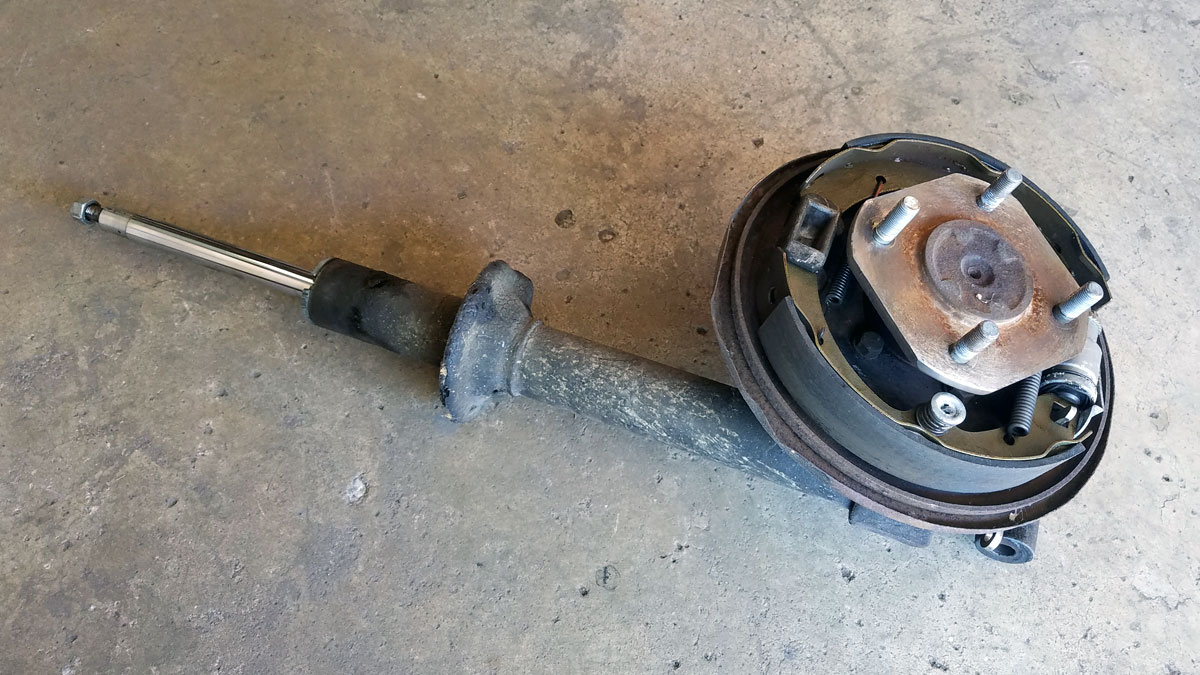
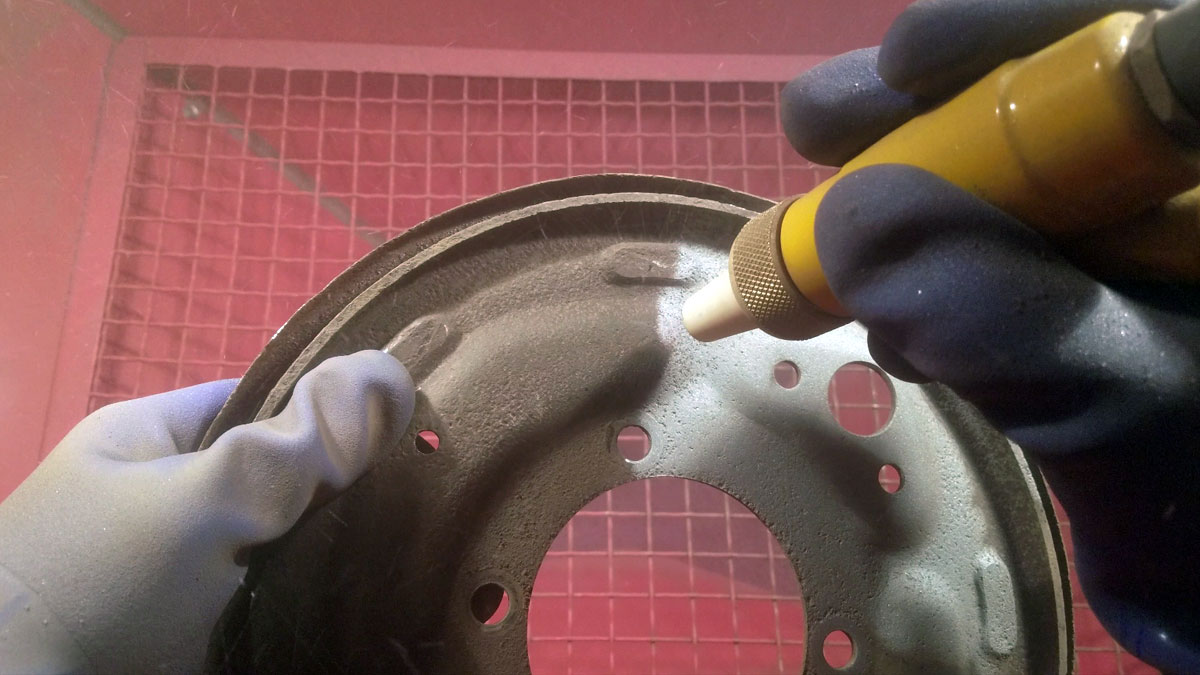
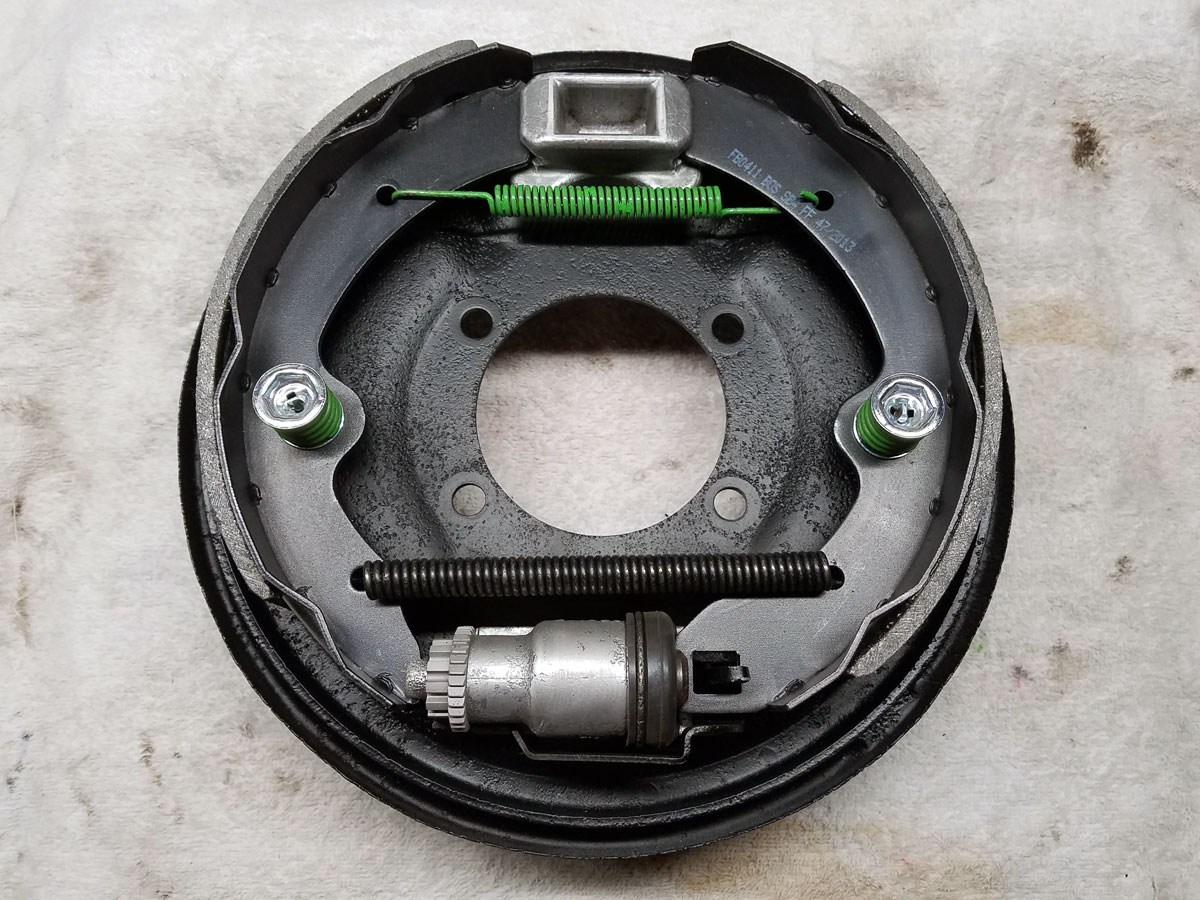
Now that the blaster was up to par, I started with the drum brake assemblies from the strut tower.
Game on. Not only did it make much quicker work of the part, it more thoroughly removed the rust too. Very excited to have a working sandblast cabinet in my tool arsenal.

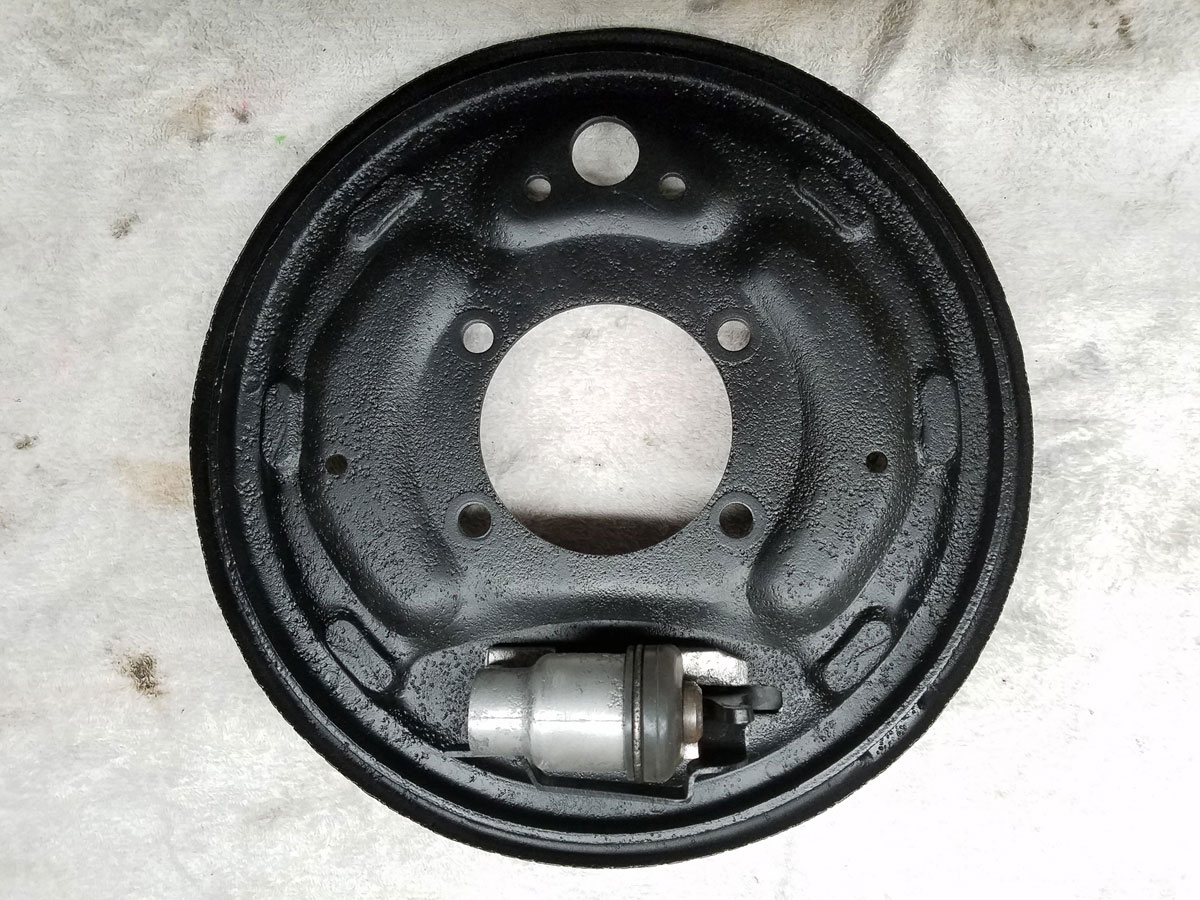
And yes, I’ll probably replace these drum brakes with discs in the future, but for now it only cost me a little time and a rebuild kit that the previous owner so graciously included in the sale of the car.
With the drum brakes rebuilt it was time for the strut tower itself.
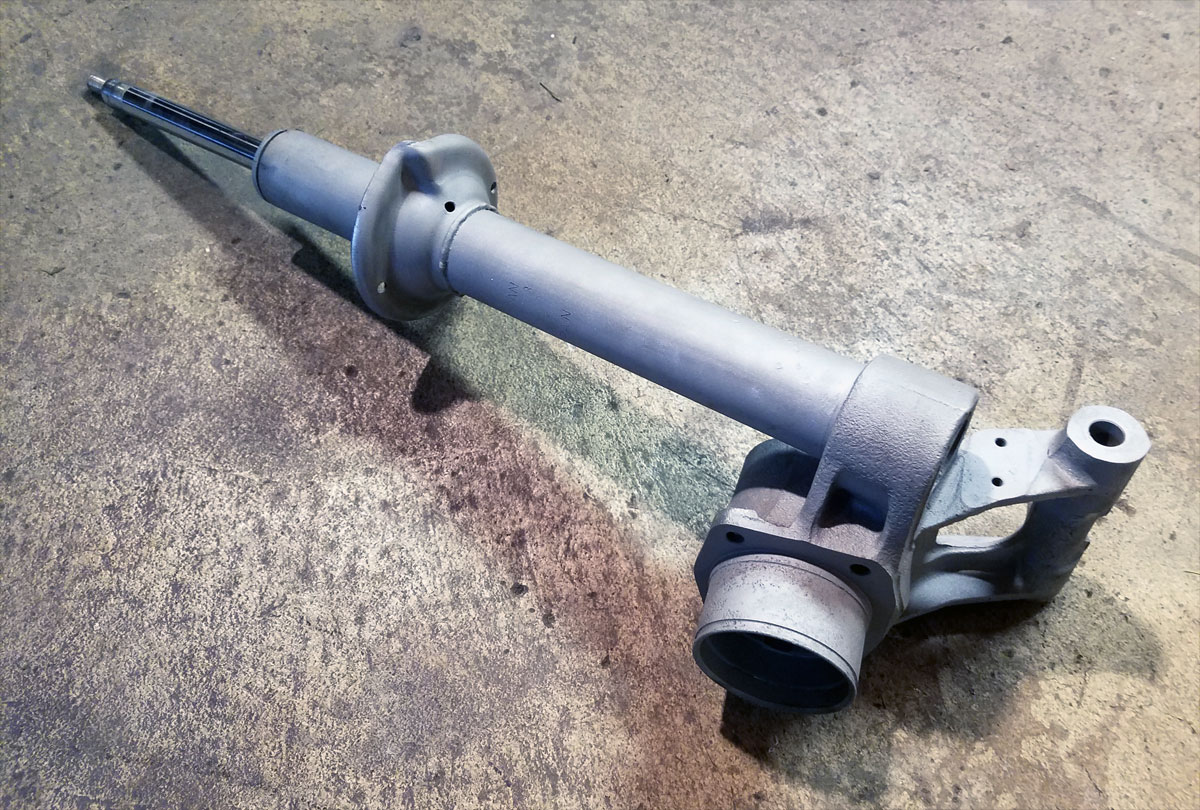
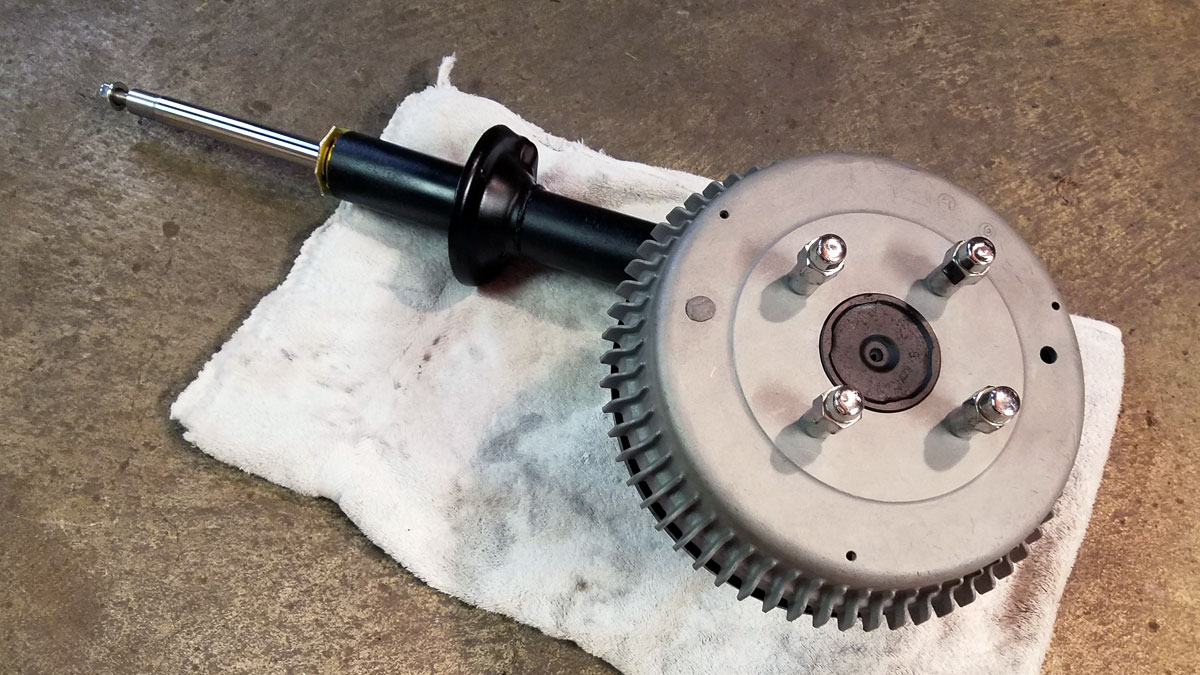
After it was blasted and refinished, I replaced the strut with a new one, installed the stub axle and blasted the finned drum brake cover and coated it in a matte clear to finish off the strut assembly.
Honestly I couldn’t be happier with the results.
To find a particular page, use the search feature or index.