11). Passengers floor II

With the floor pan in place, I taped it off with some masking paper and cleaned the steel with a wax and grease remover.

Next I applied an etching product that contained zinc to protect the steel from future rust and prepare the surface for epoxy primer.

I had also bought some brushable seam sealer that claimed it could be applied directly to metal, you just needed to tape off the area then slop it on over your seams.

This looked horrible in my opinion…

And even worse once the epoxy primer was applied.

And although I finished off this side with the brushable seam sealer, I chose a completely different product that was applied with a caulk gun after the epoxy primer had been applied and I feel it worked much better than this stuff.


To find a particular page, use the search feature or index page.


10). Passengers floor I

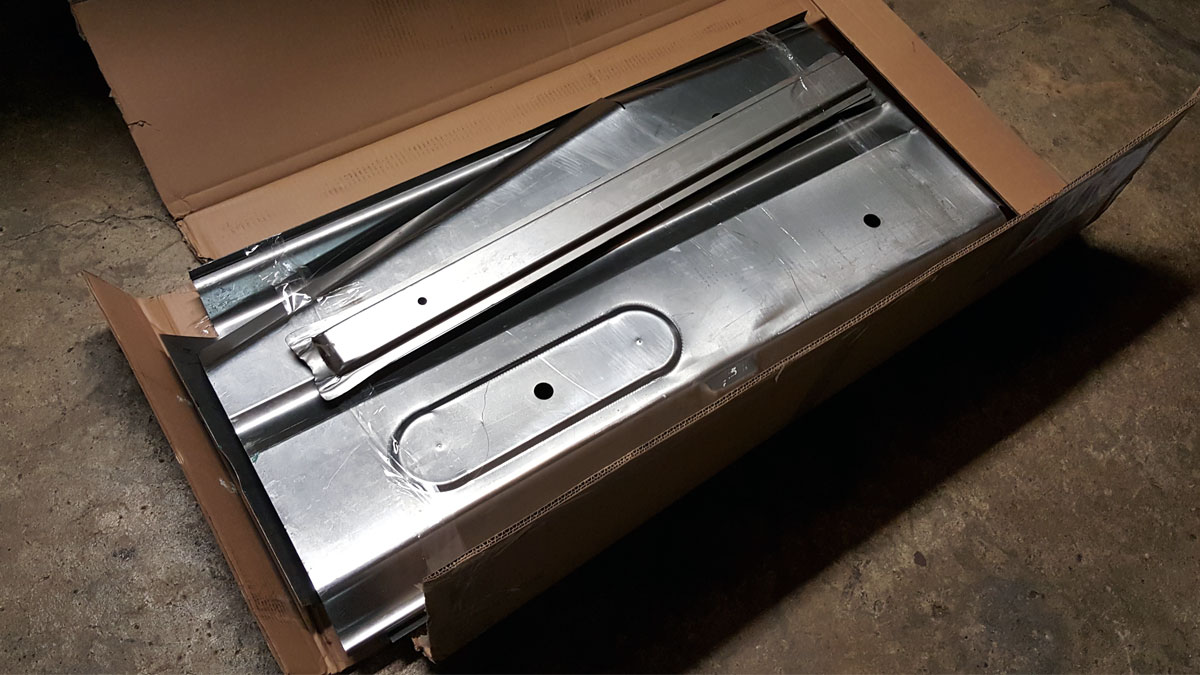
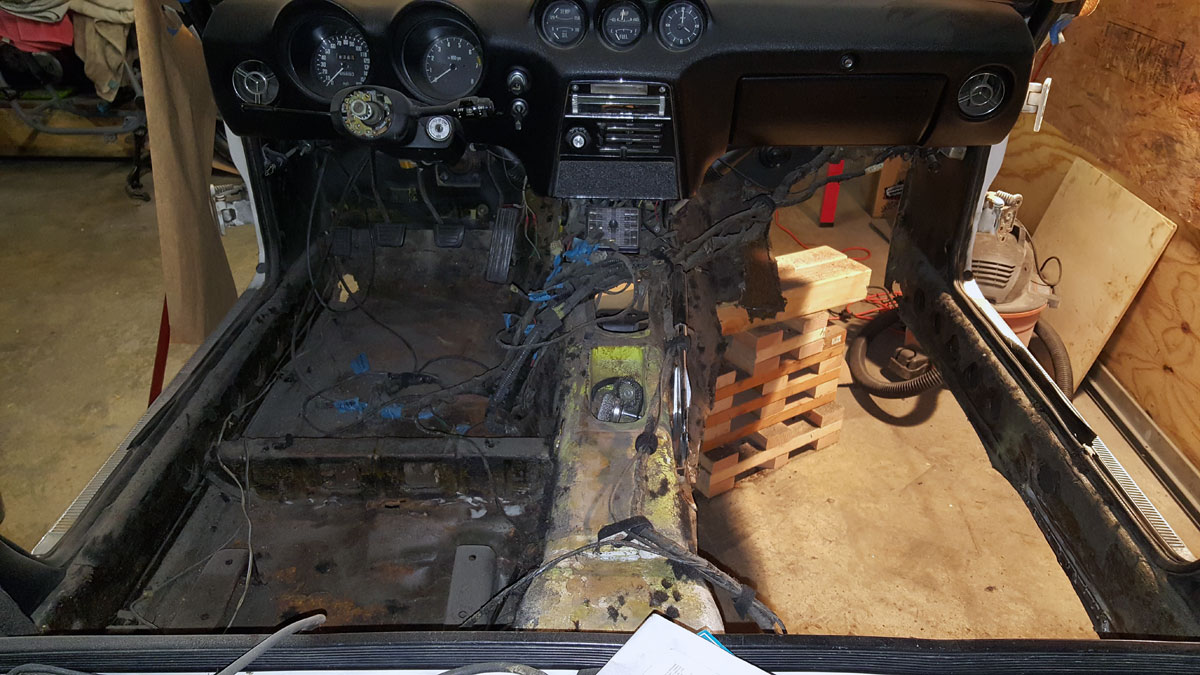
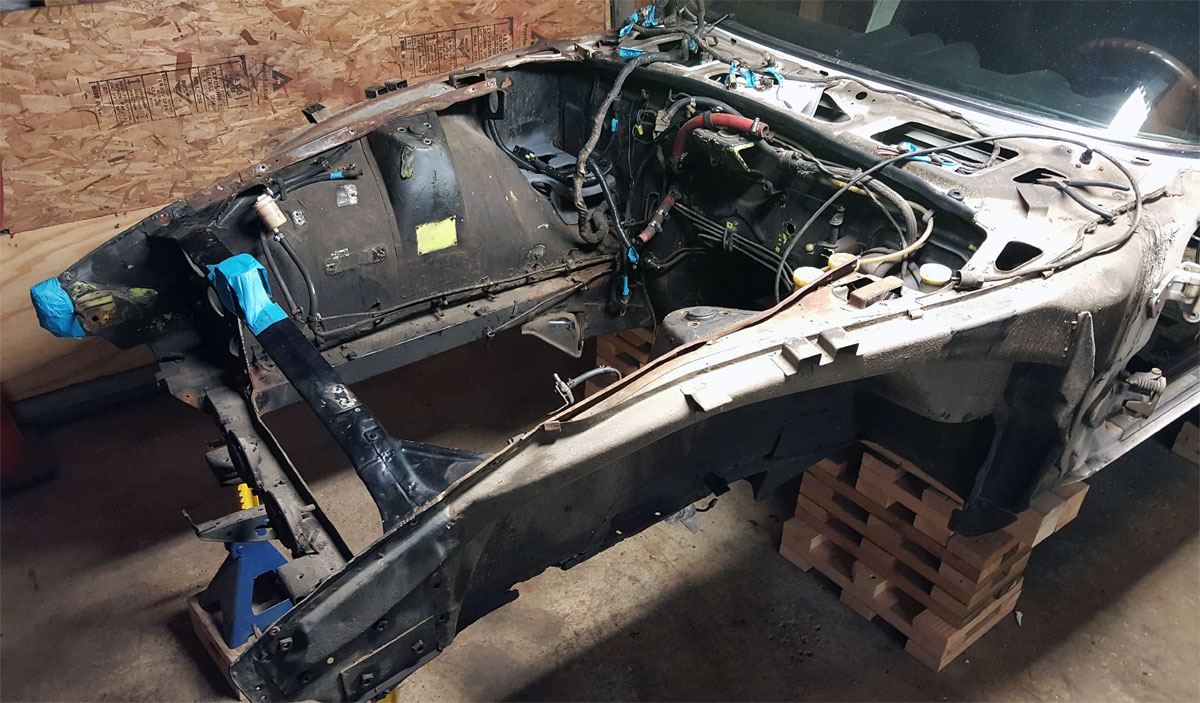
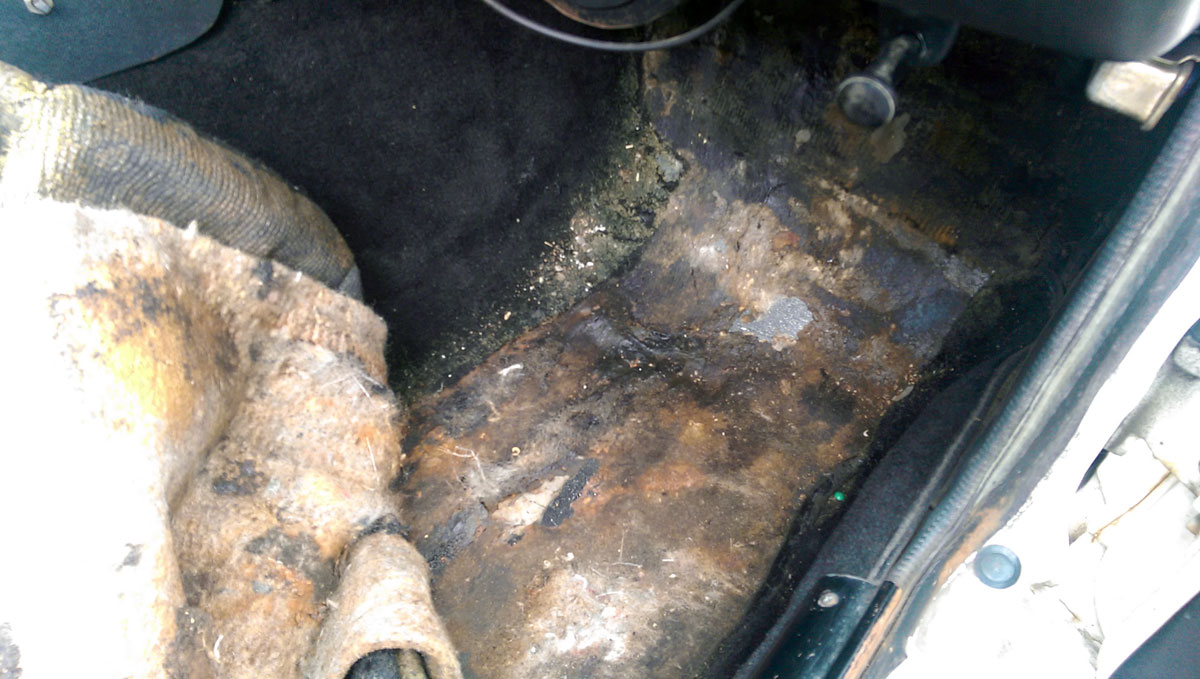
At this point I wanted to take a break from wire wheeling and the floor pans arrived from Zedd Findings.

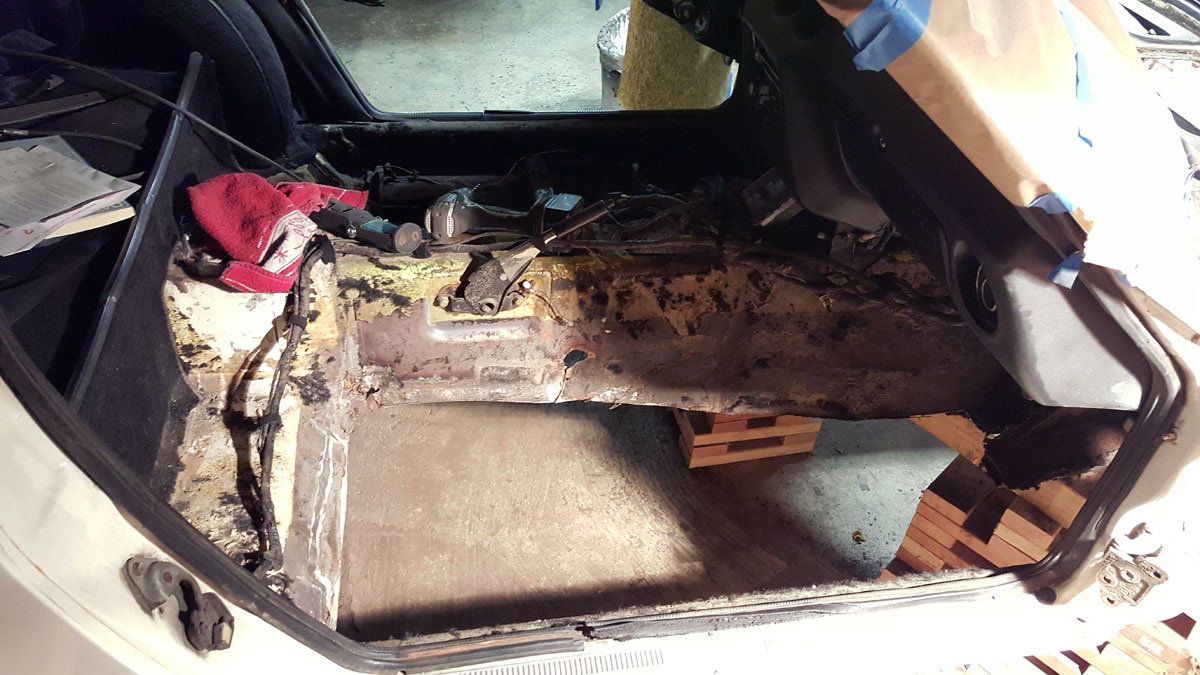
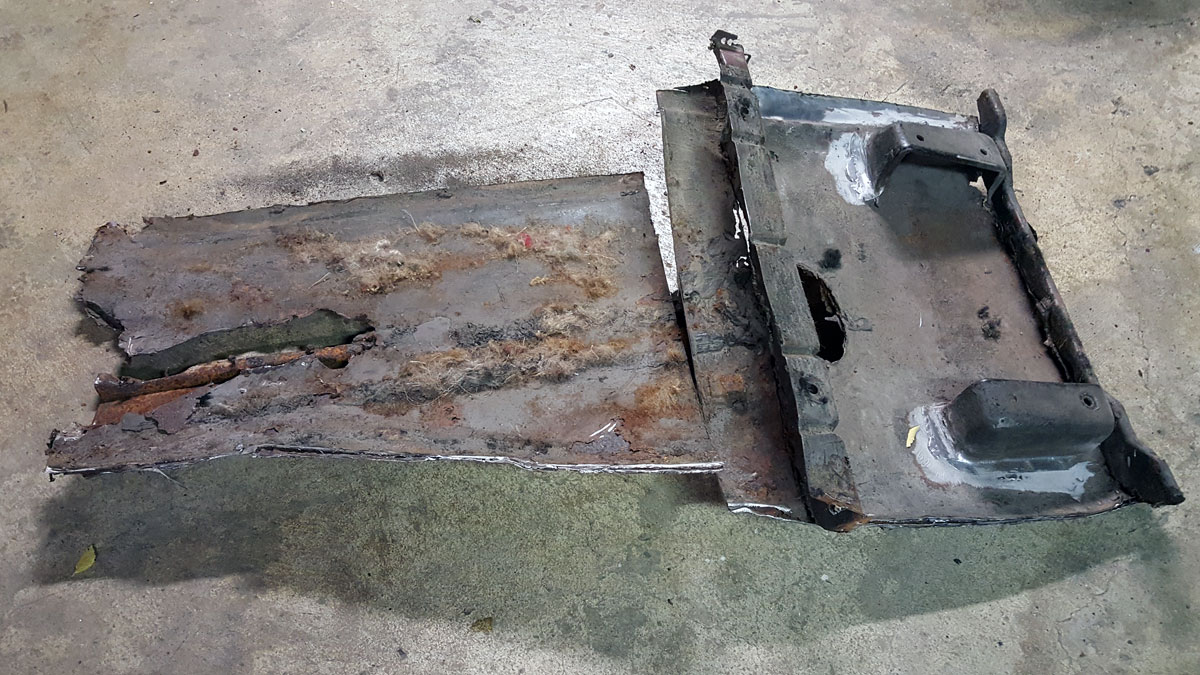
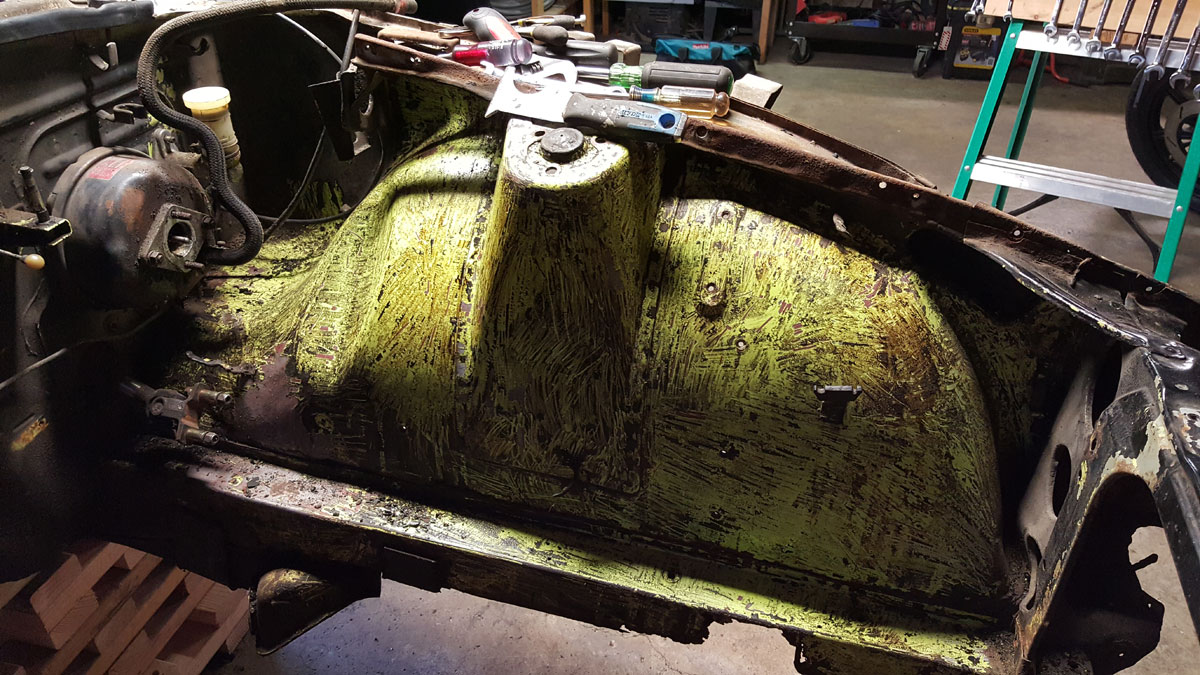
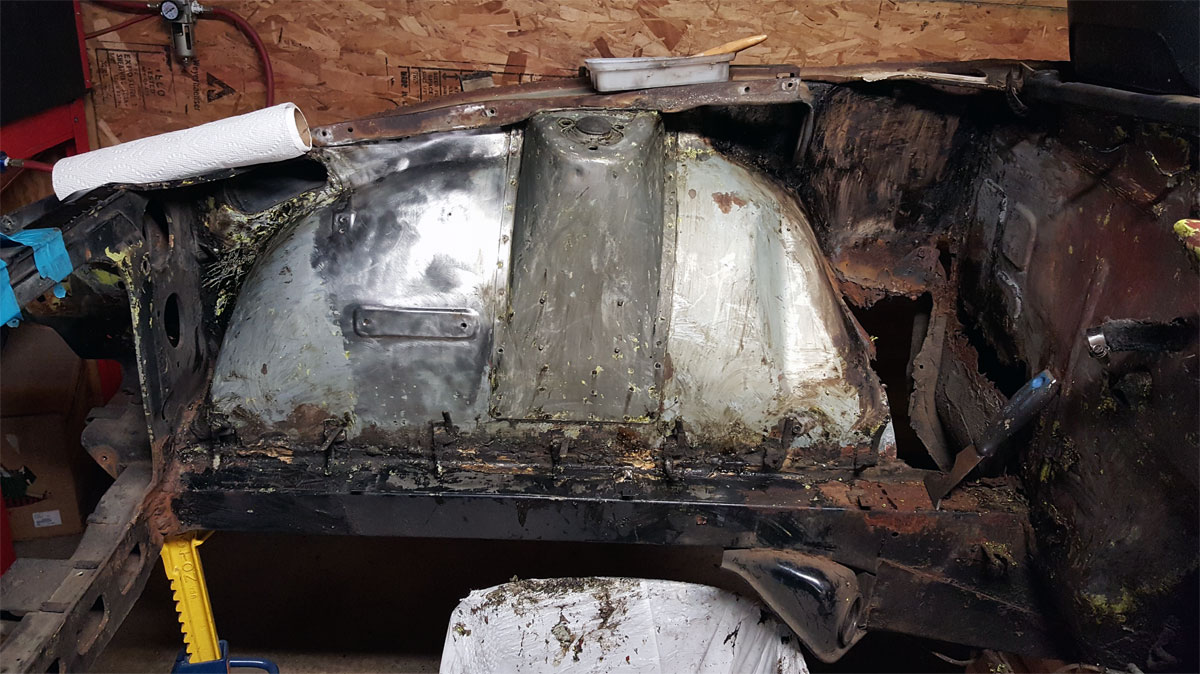
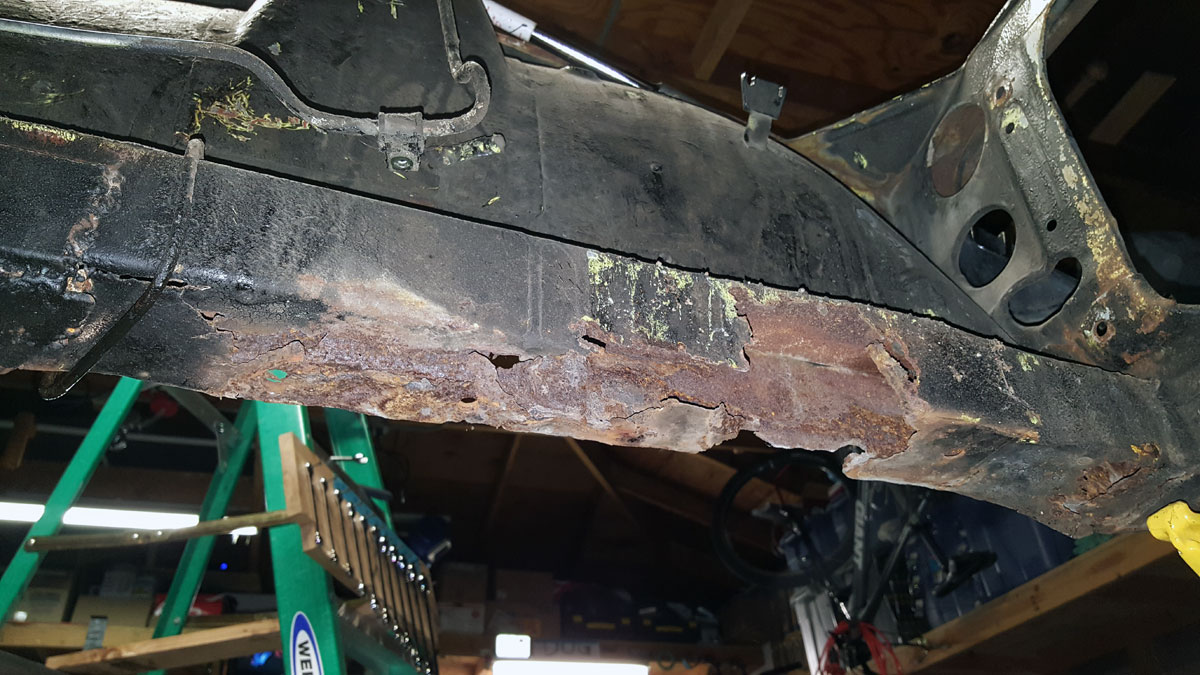
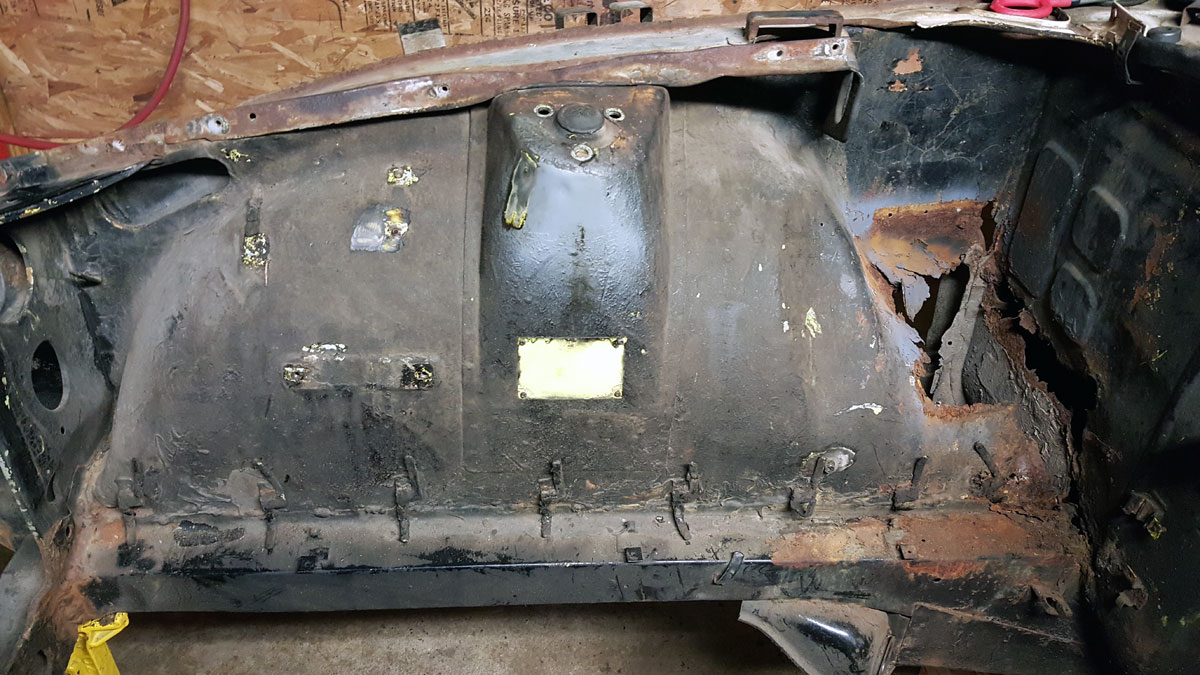
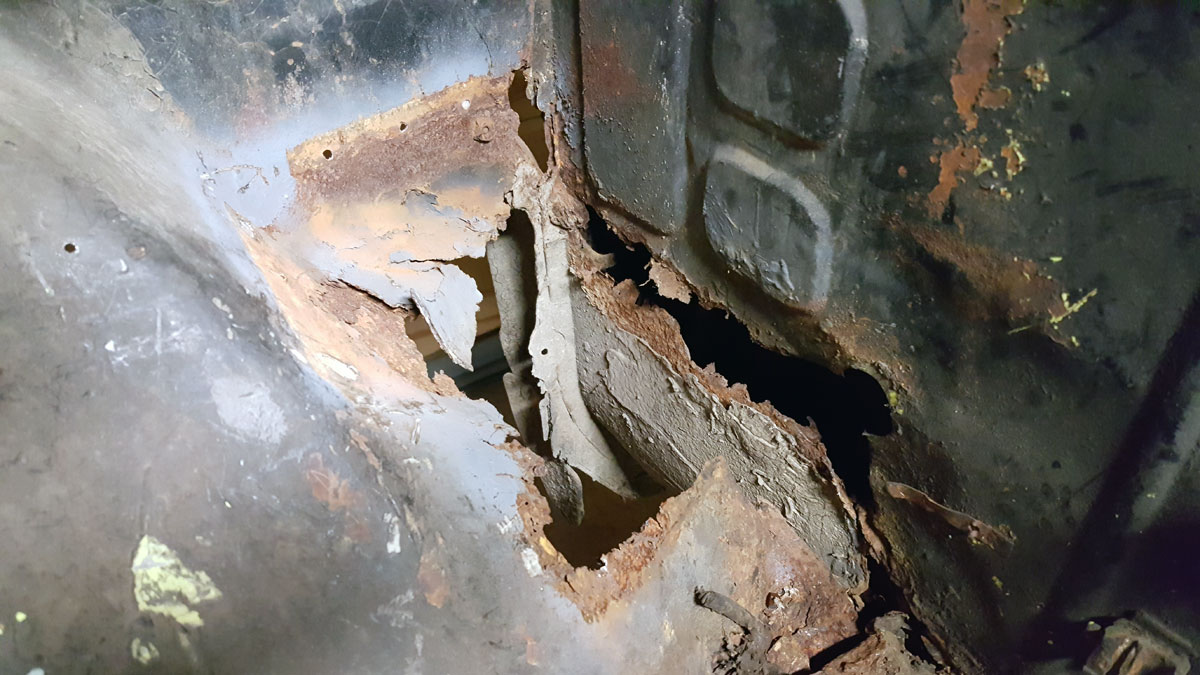
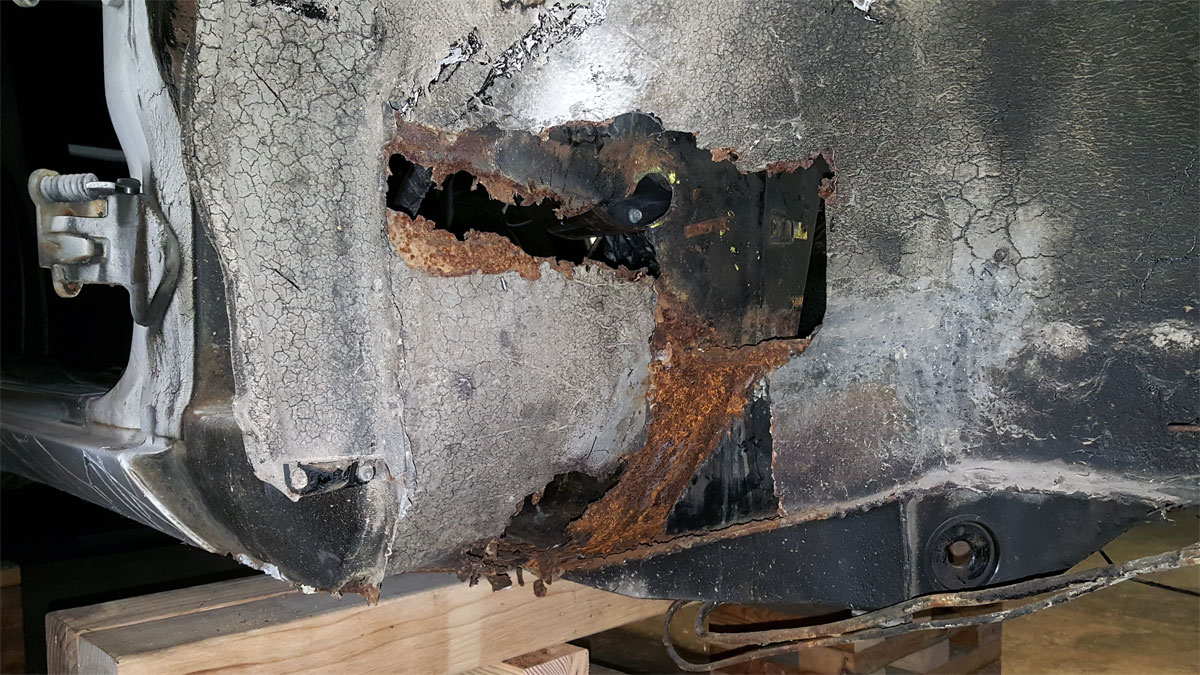
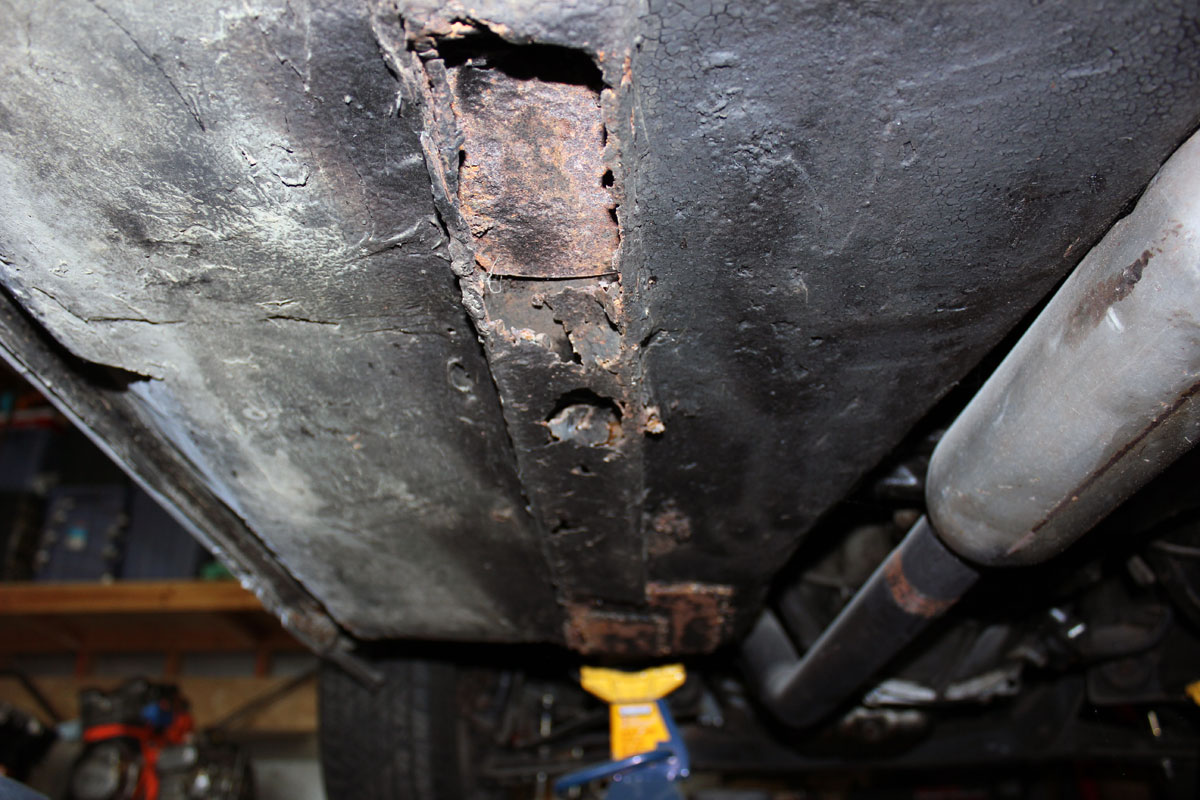
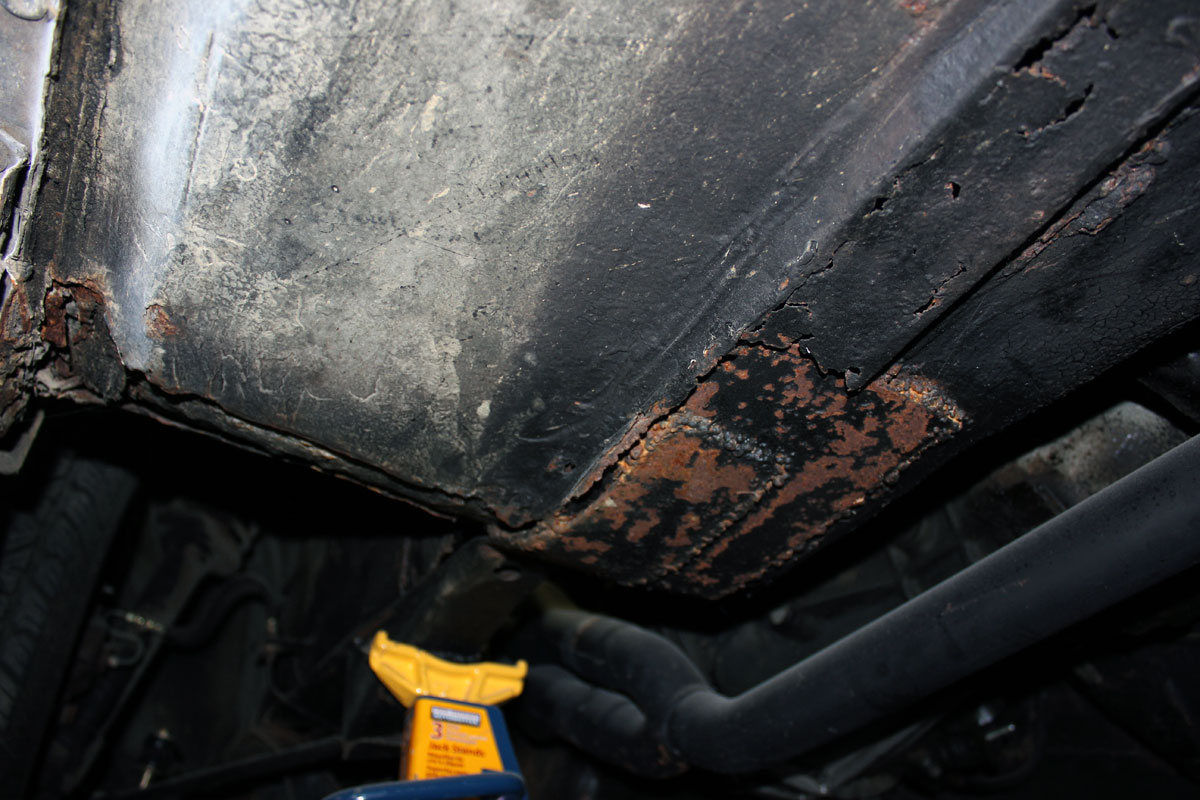
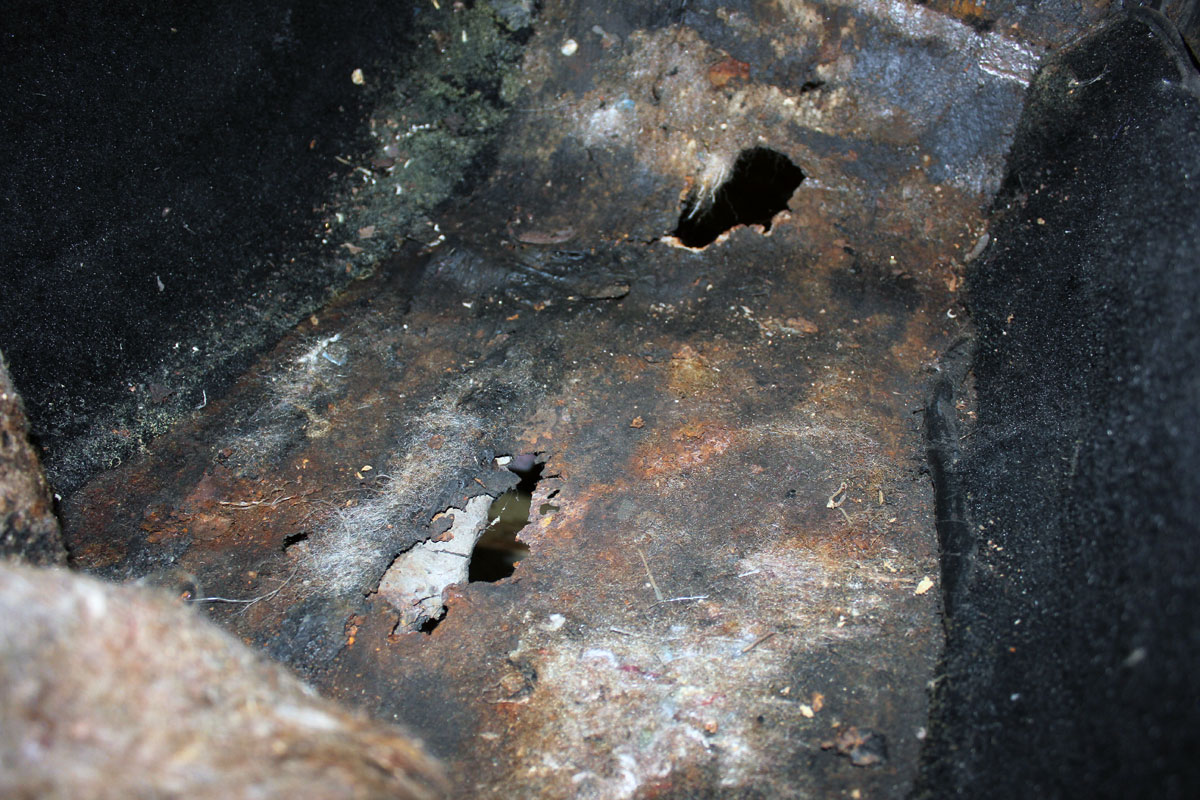
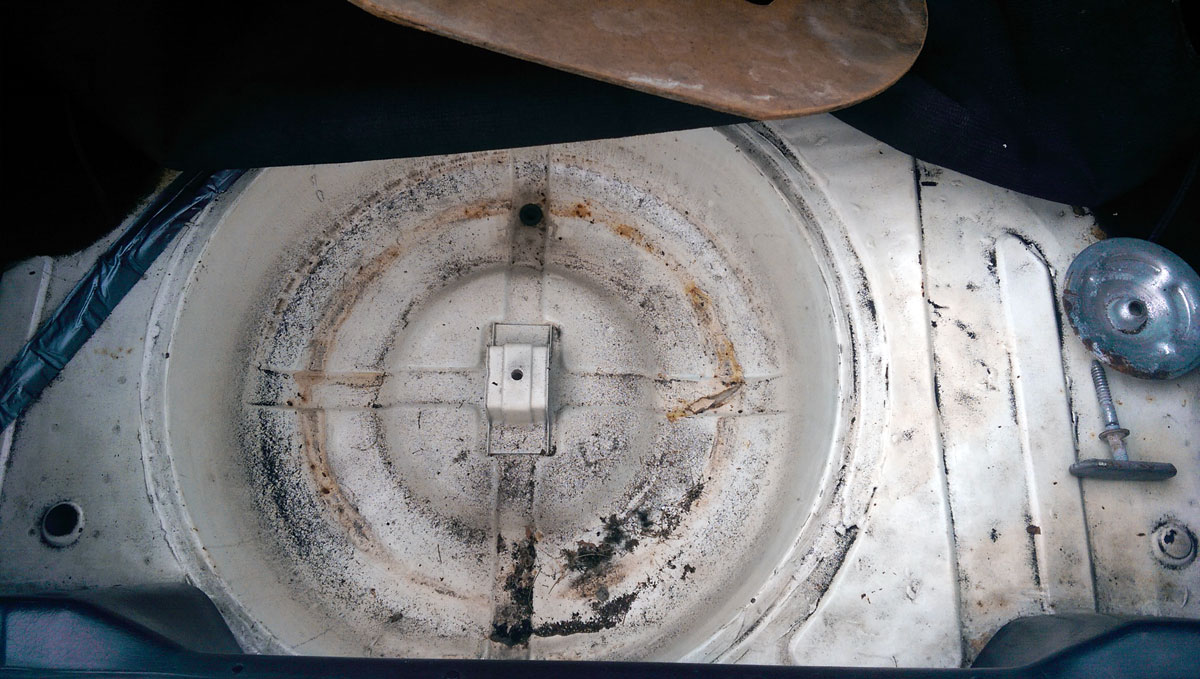
So I cut out the passengers side floor pan and discovered that the original floor pan had rusted through and then been covered with sheet metal and a very thick layer of body filler. Again, it was a mess.

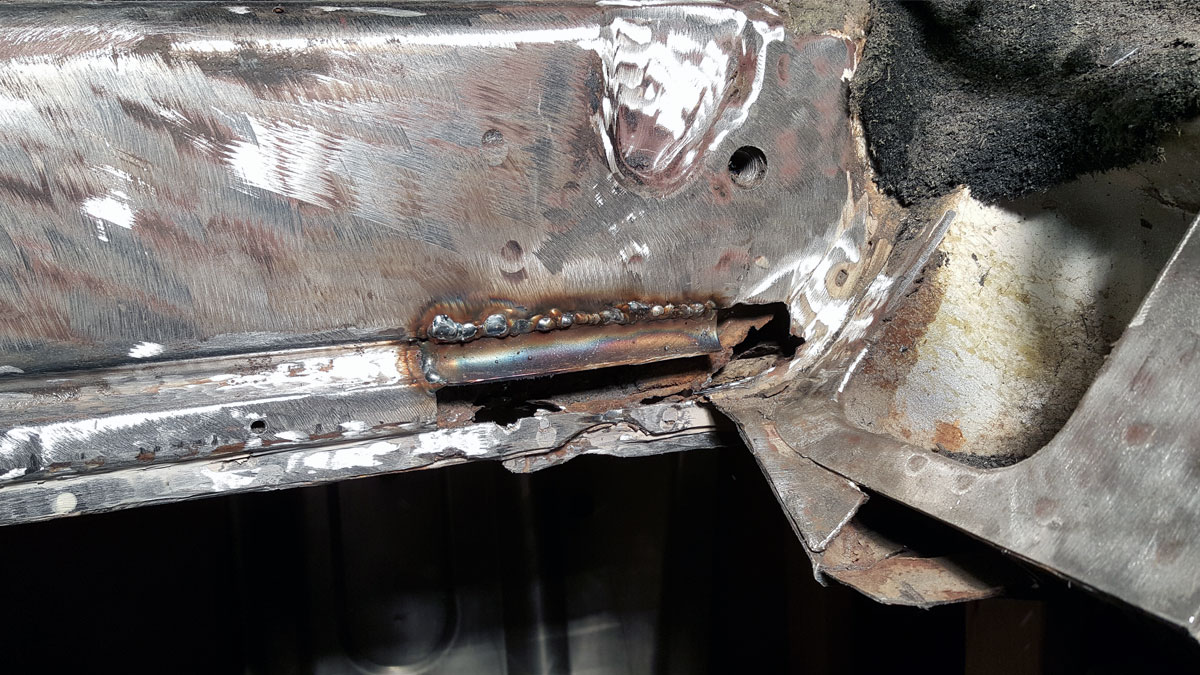
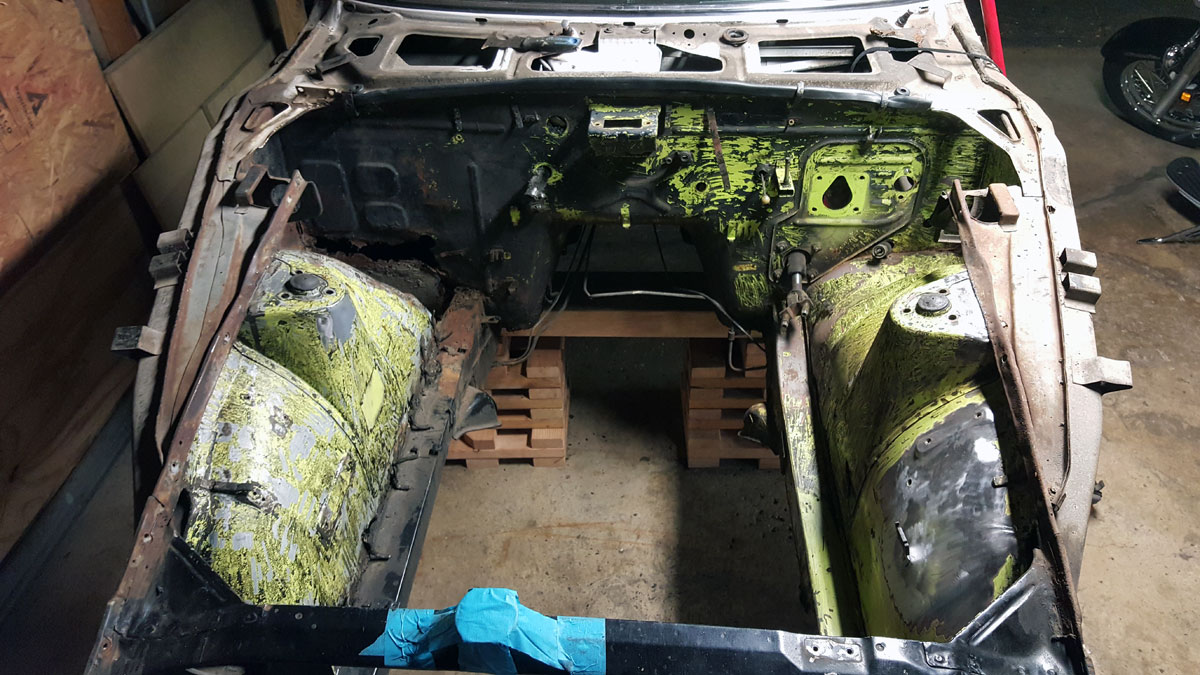
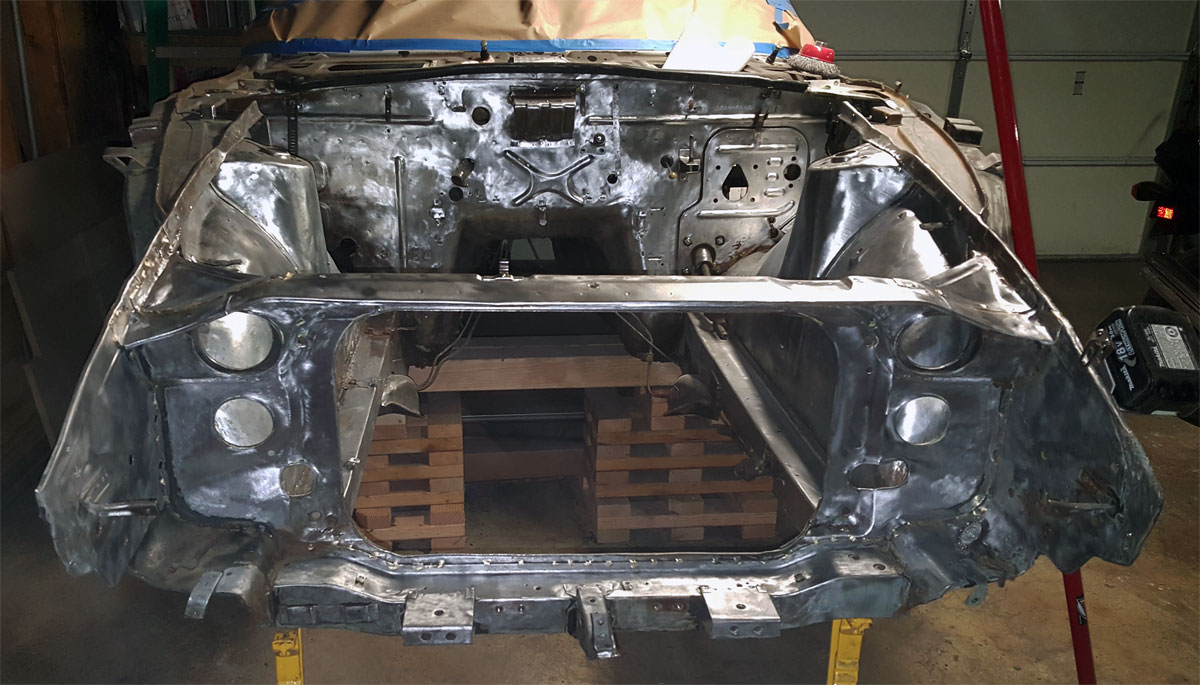
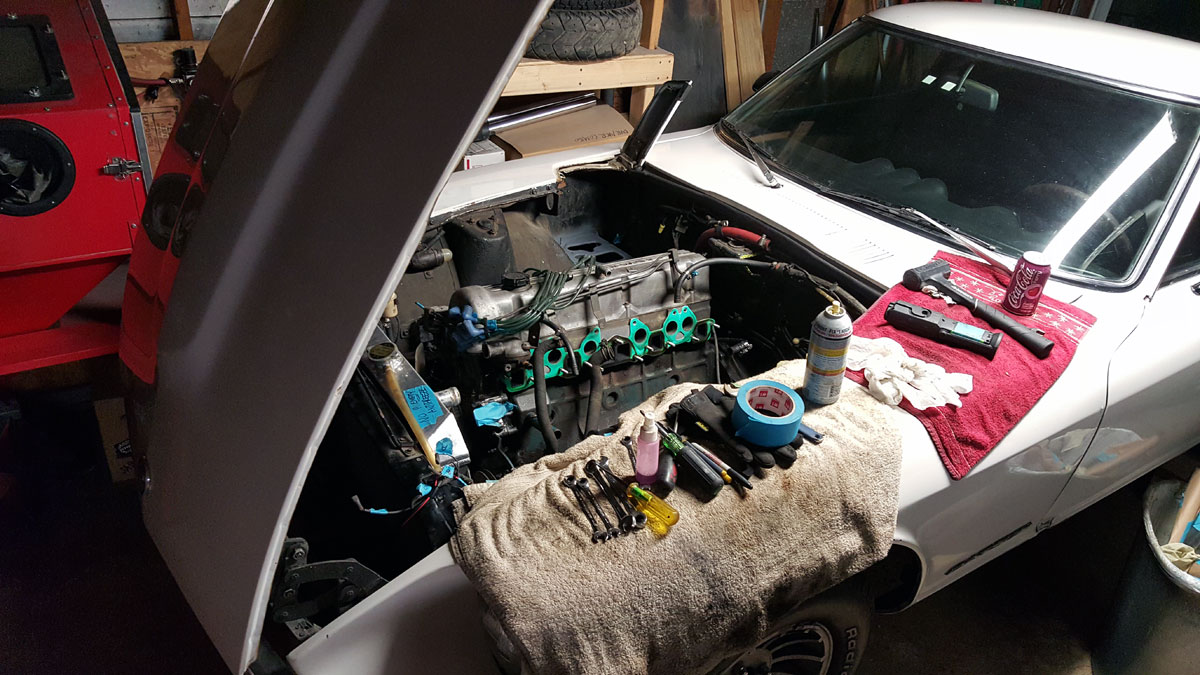
I also needed to work on many other areas around where I cut out the floor pan before I fit the new one in, and this was my introduction into welding on this car.

Now I had welded in the past, quite a bit actually, but with a stick welder on fork lift parts and structural I beams. MIG welding 20 gauge steel was a bit foreign to me. But I did my best and would grind down the welds to hide my sins and make everything fit together smoothly.

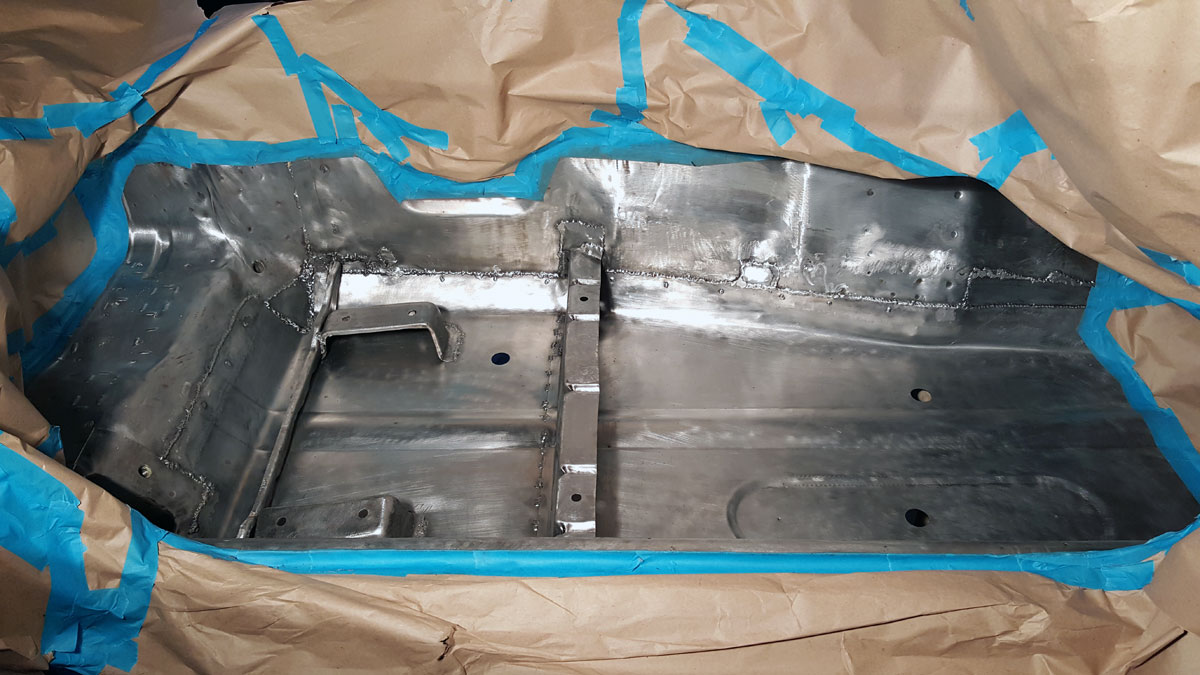
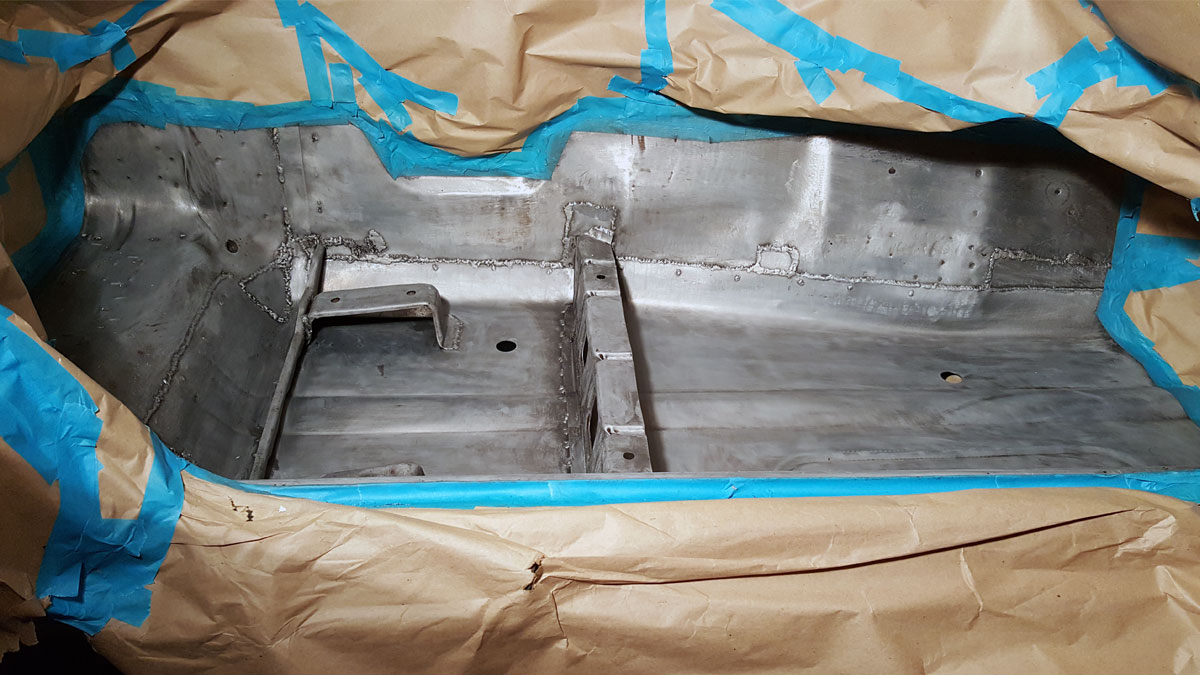
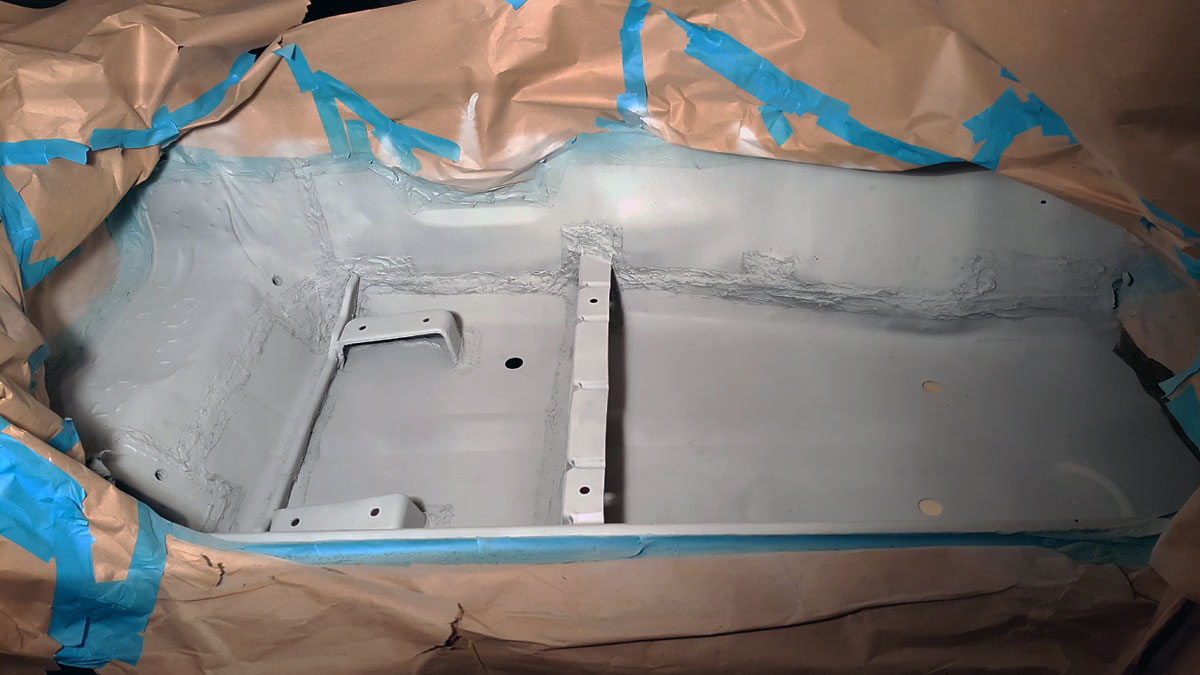
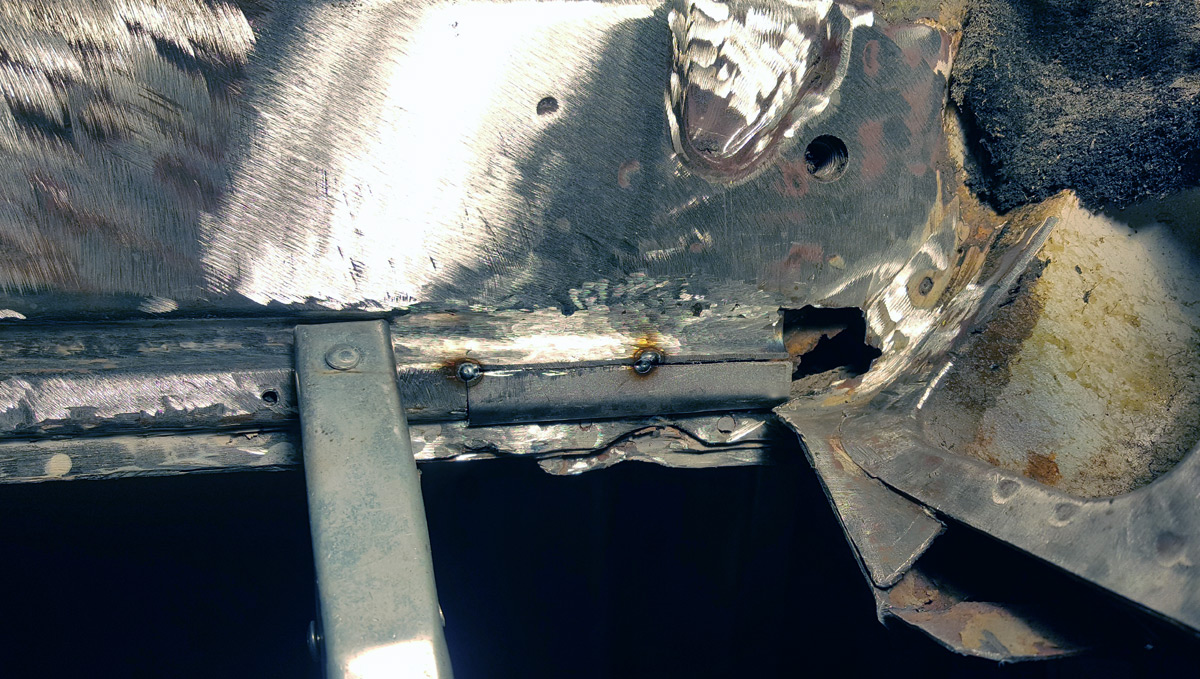
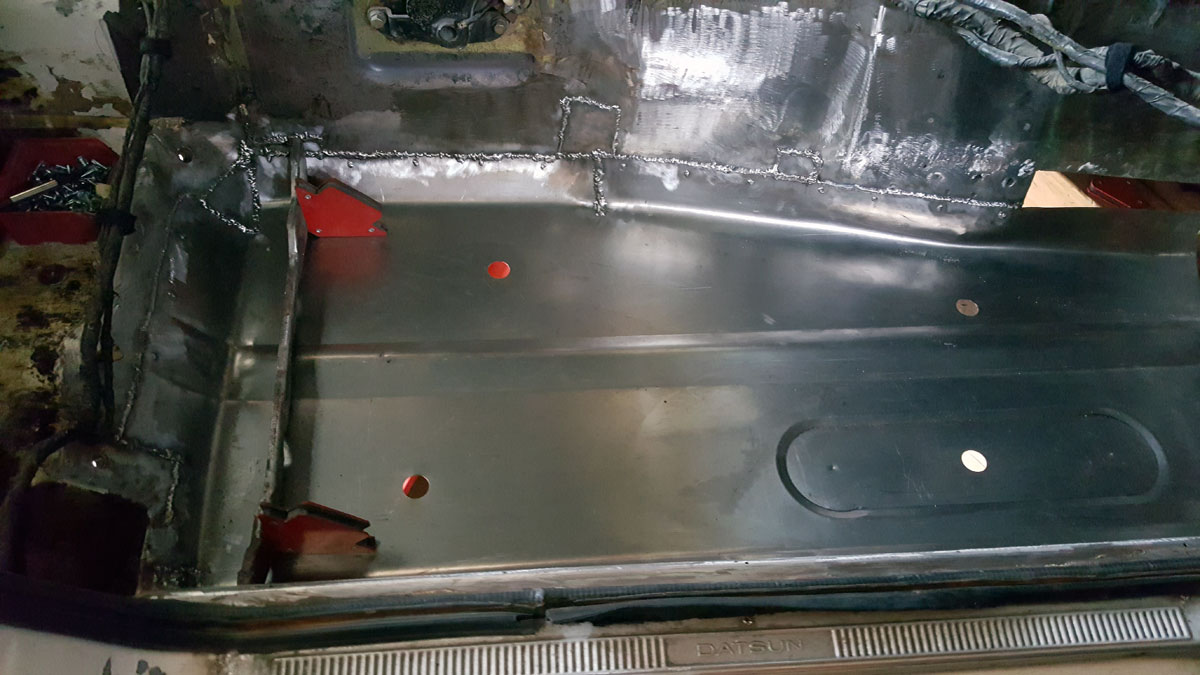
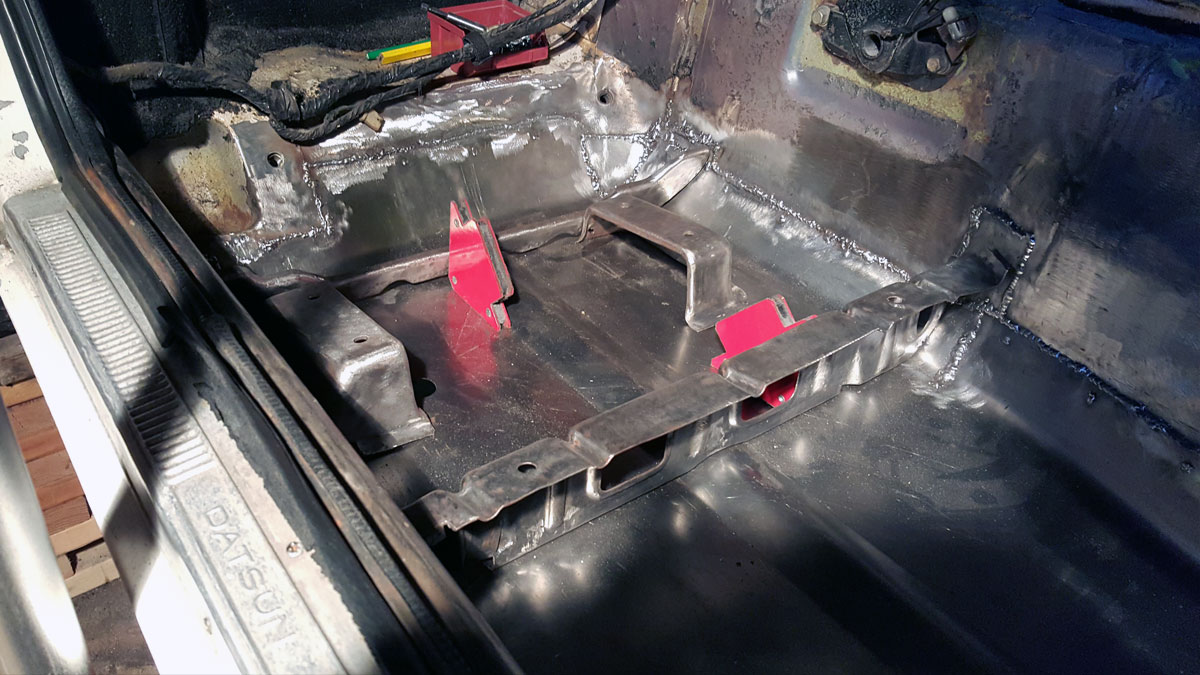
After the majority of the other problem areas had been tackled, I fit the replacement floor pan into the opening I had made earlier, using self tapping sheet metal screws to hold it in place.

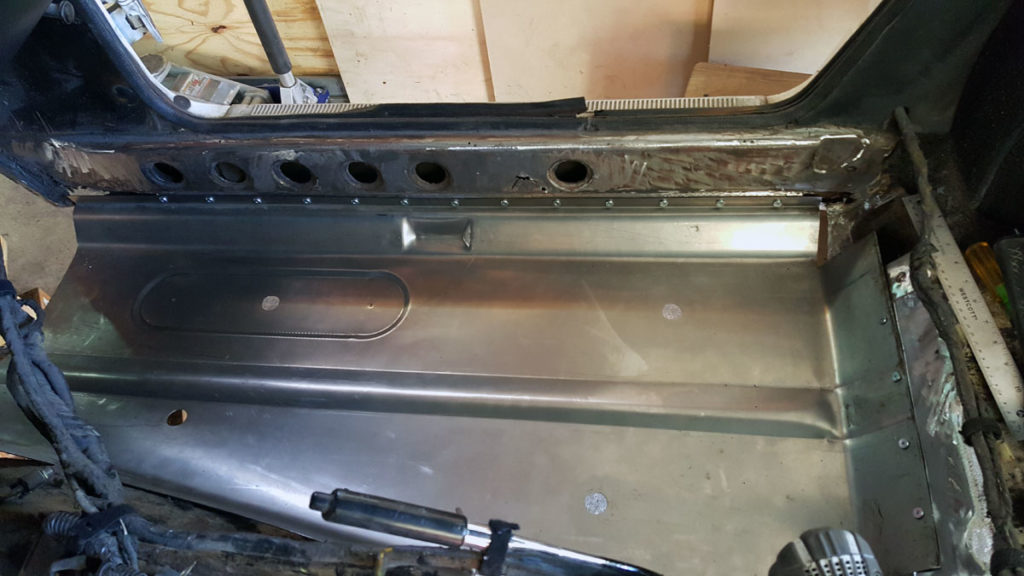
Now I didn’t think that pulling out each screw and making a new spot weld was enough to really hold it, so I welded along the top edge all the way around as well. Probably overkill and not exactly the right way to do it, but it was solid when I was done, that’s for sure.

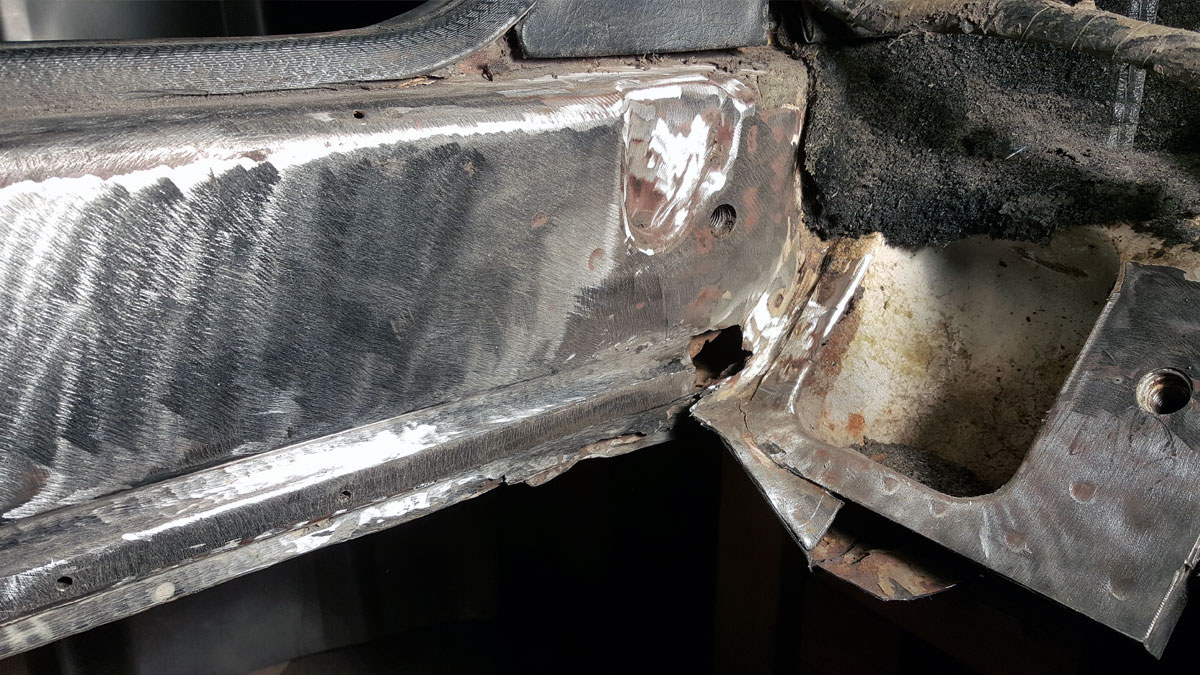
You can also see that near the front of the floor pan, against the transmission tunnel,  I had to bend it pretty tight to get it to fit. I probably should have done this differently too, but it did work out, even if it did look a bit “pinched”.

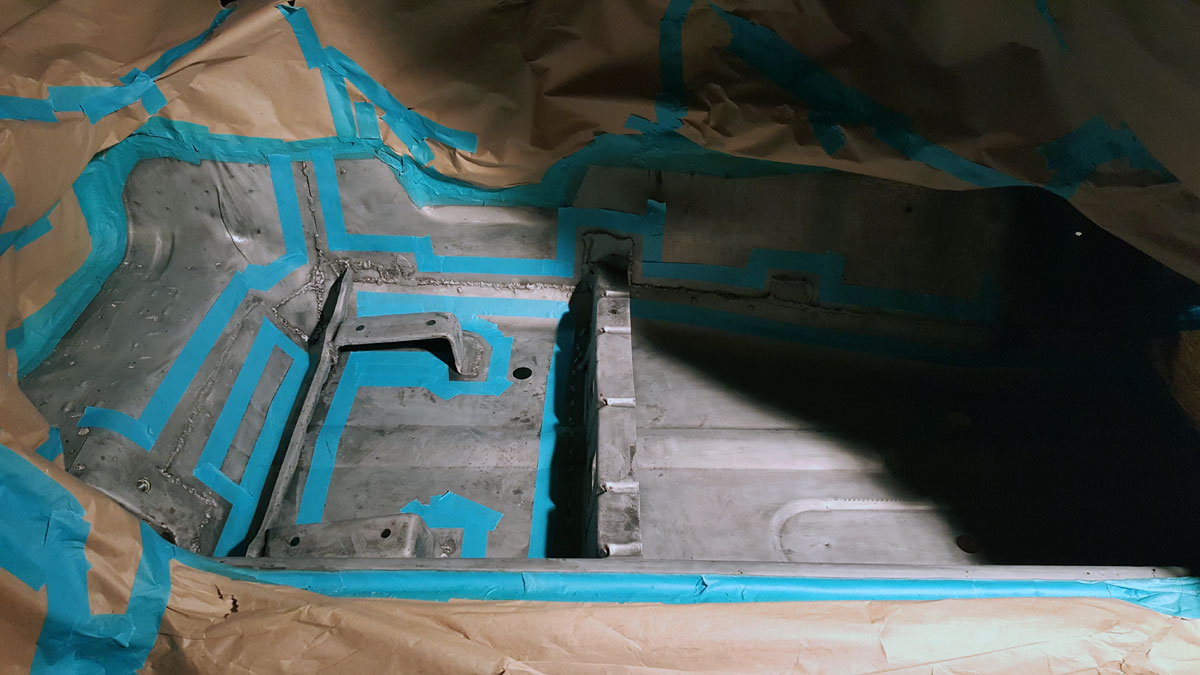
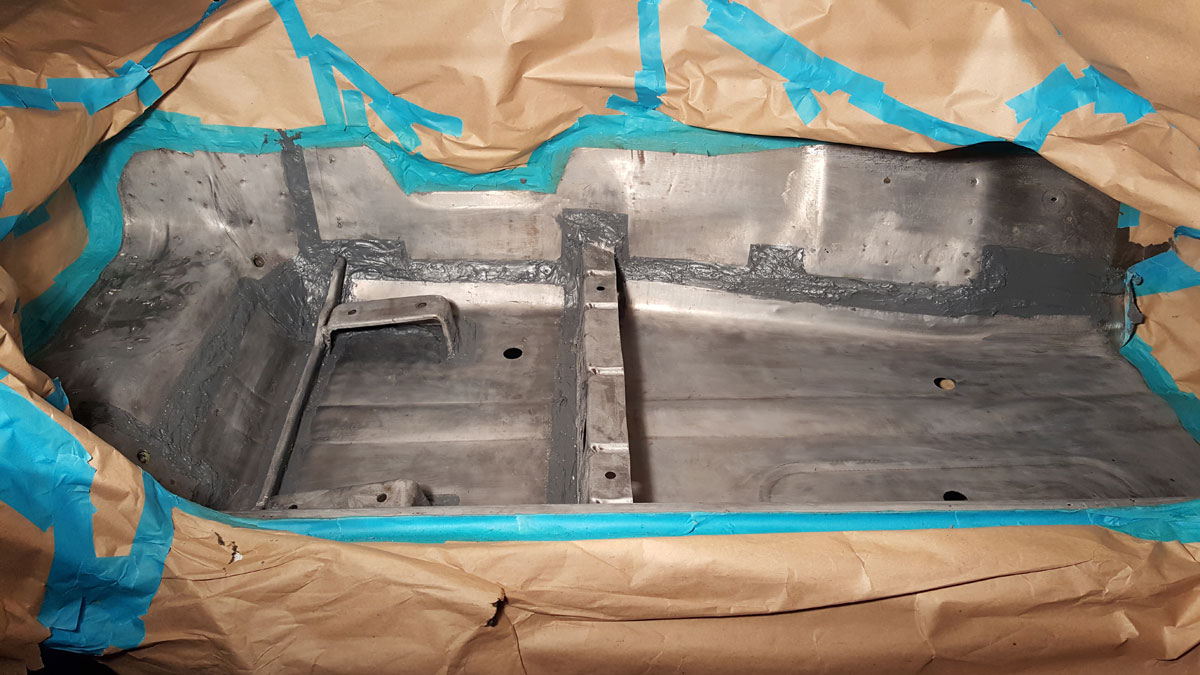
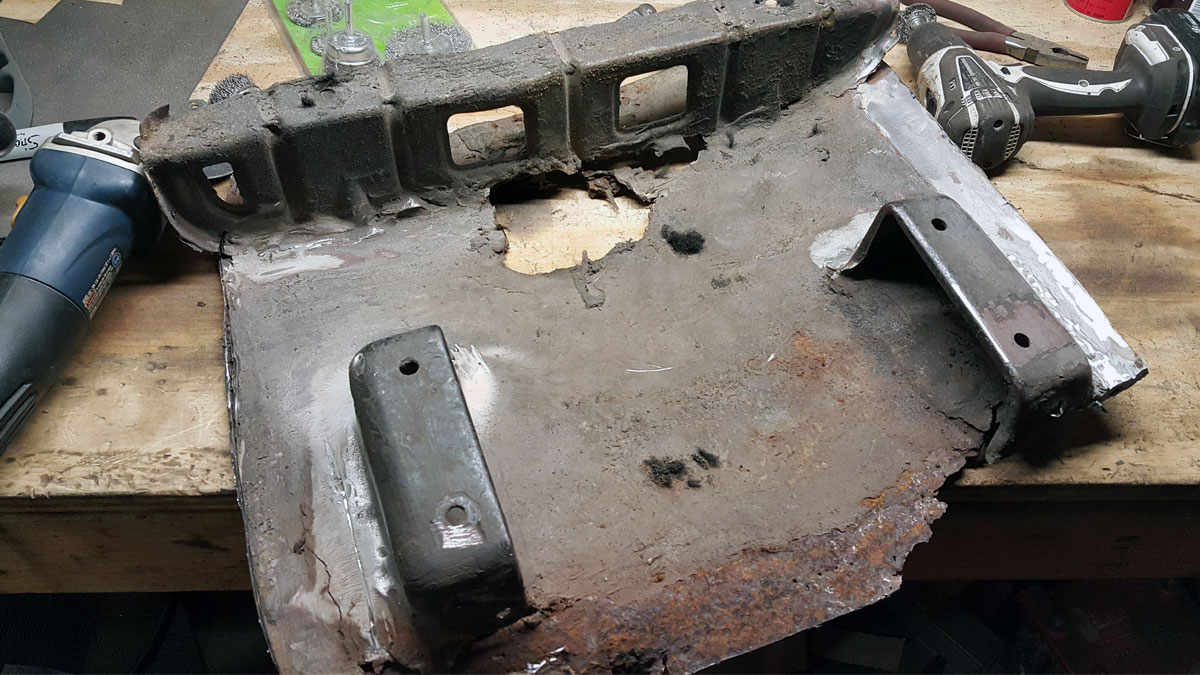
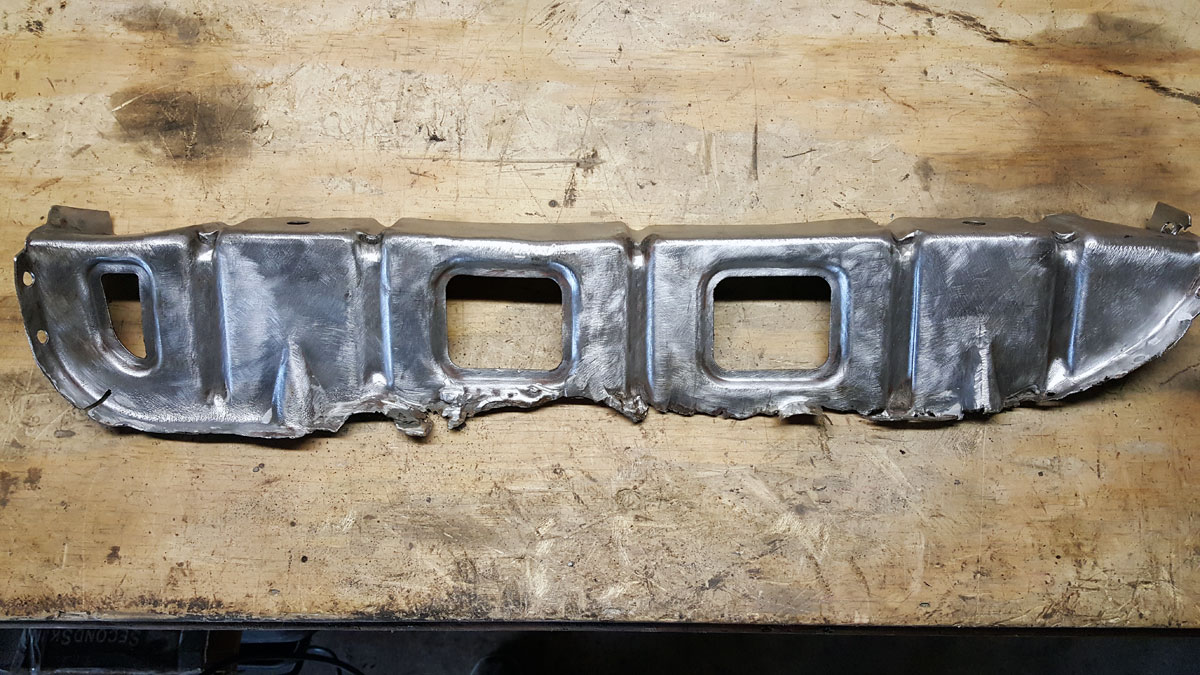
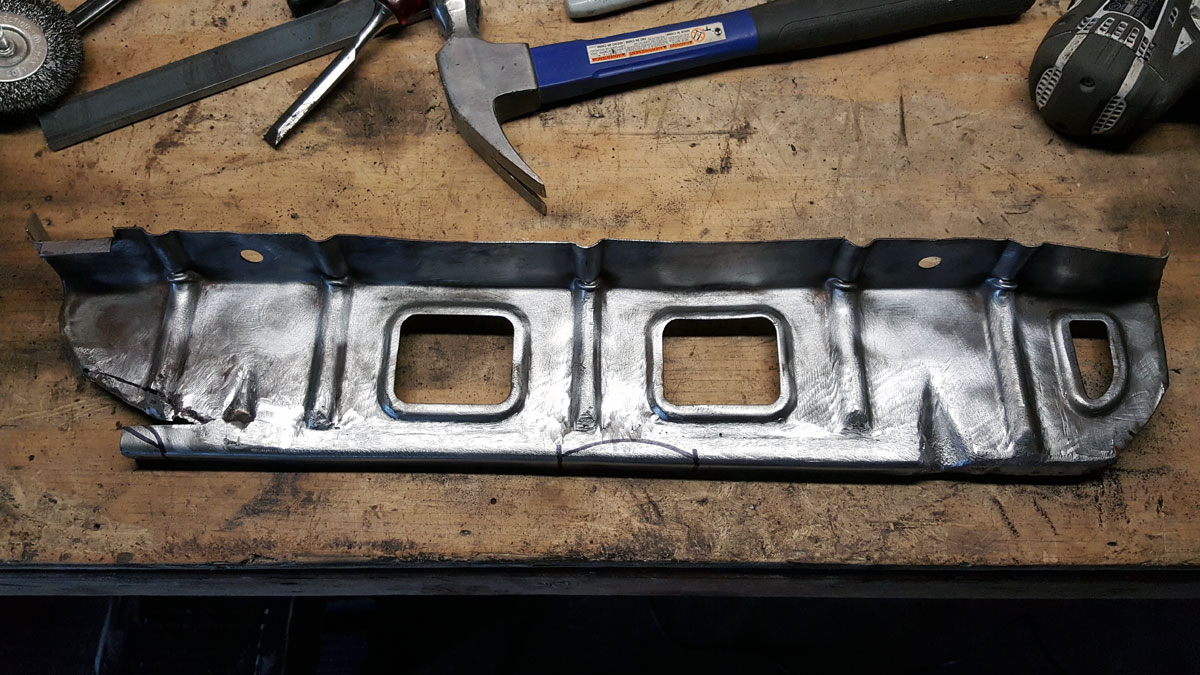
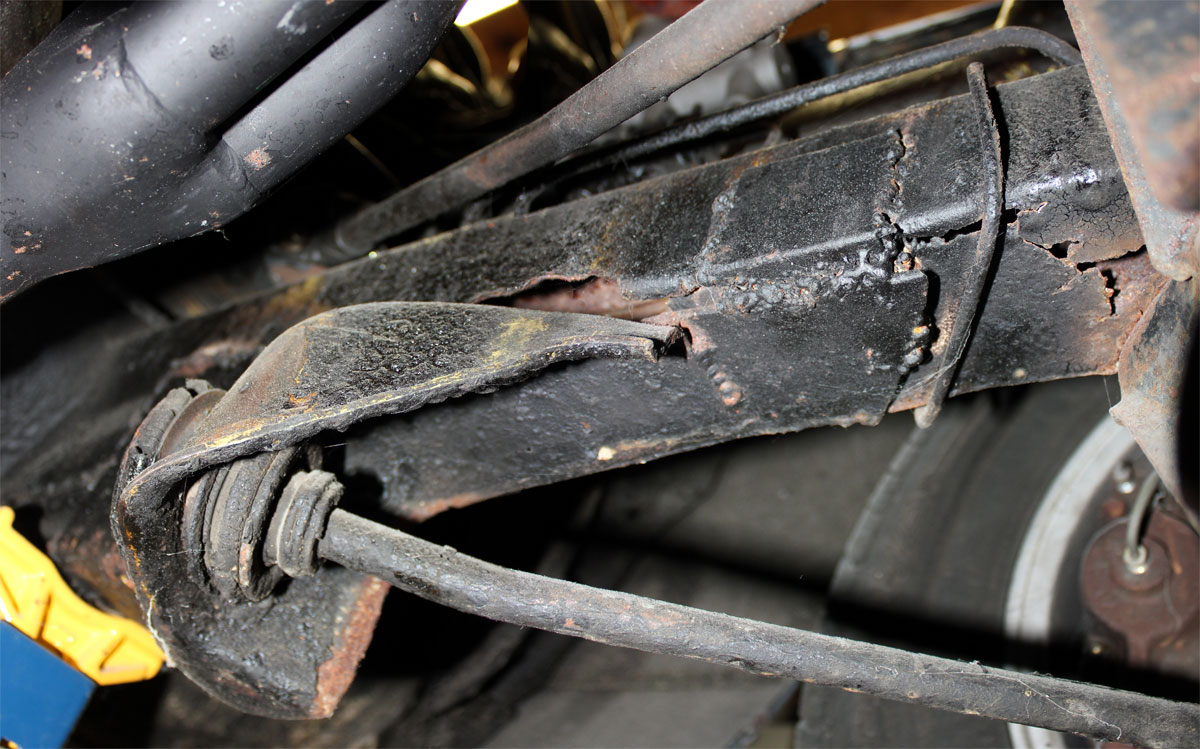
Next up were the braces and seat brackets that I had to remove from the old floor pan, clean up and fix to make work on the new floor pan.

I had my mind set on trying to re-use or rebuild everything that I could, but these were pretty far past it.

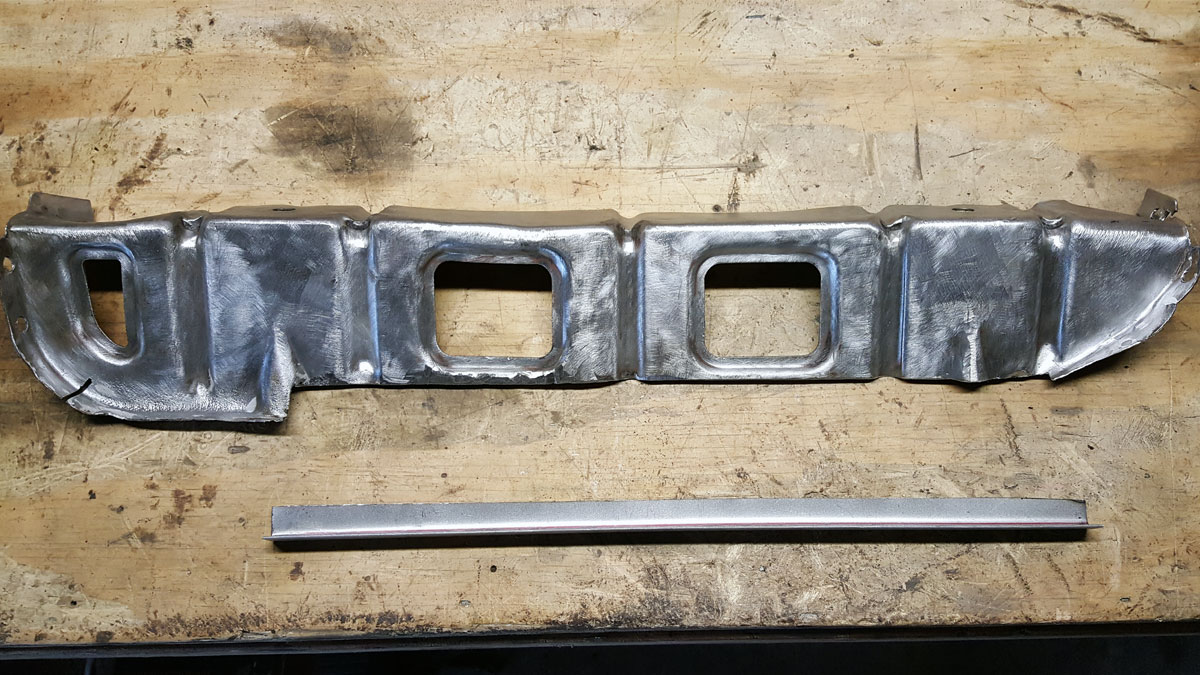
Somehow, they managed to turn out alright in the end though.


To find a particular page, use the search feature or index page.


9). Engine bay

Now that I had most of the stuff out of my way in the engine bay, I began scraping off the coating used during the previous repair.

It was the similar to the undercoating, a tar like substance that I tried heating then scraping to remove, but that just created a big mess. So I stuck to using a sharp paint scraper and went at it.

After I got down to the original paint, I decided to try using a paint remover then follow that up with a wire wheel. While the paint remover worked fairly well, I could have just skipped that step and went directly to the wire wheel. Which I later ended up doing.

Speaking of the paint, I think the car looks good in white, but I really like the original lime green. I’ve went back and forth over the course of this project and still have a ways to go before that’s even a decision I have to make, but I’m seriously considering taking it back to its original color.

It may not look it, but this took an eternity, over two weeks if I remember correctly. Wire wheeling is not for the impatient.

With the majority of the engine bay cleaned up, I decided to move on to the floor pan and foot well so I can eventually start to work on the frame rail.

At the time I thought it made more sense to buy a set of pre-made floor pans and frame rails because I figured that they would be more precise than if I made them. So I ordered some replacements from Zedd Findings.


To find a particular page, use the search feature or index page.


8). Deconstruction II

After I removed the engine, fenders, suspension, steering assembly and grill, I moved on to the doors and interior. Compared to newer cars, these things come apart like Lego kits, super easy. I just hope they go back together just as easily when the time comes.

After removing the seats and carpets, the floor pans were pretty bad and poking at the rust inevitably made it worse.

But not as bad as the frame rails. It was shocking to realize that the passengers side suspension was held on by very poor welds and the drivers side was held on by practically nothing at all. To think I had been driving the car for months in this condition. Looking back it was truly amazing it stayed together.

Moving on to the engine bay, I began removing wiring and other components so I could take it down to bare metal.

Once I had most everything out I could see how bad the rust really was. Especially in the battery tray area. Which, once the tray was removed, the whole area pretty much disintegrated.

I remember thinking I may have gotten in over my head. I mean, I’ve done a little here and there with cars in the past, and practically rebuilt entire motorcycles, but this was a whole new ball game.

But I figured the car wasn’t that expensive to begin with and it would have probably been destined to become a parts car or headed to the junkyard otherwise, so what did I have to lose? Maybe I can learn a new skill and it’s not the end of the world if I make a mistake or two, so I decided to press on.


To find a particular page, use the search feature or index page.


7). Deconstruction I

Now that I had the engine out…

I added some wood to the jack stands to raise the car up a little higher.

Then removed the fenders and changed up the wooden supports so I could get the tires off and work on the suspension without anything in the way.

Removing the suspension however proved to be a bit tricky. Apparently bolting the cross member to the frame wasn’t in the cards when this car was being worked on back in the day. So they decided to weld it together.

Which, honestly was kind of amazing that it stayed together at all considering how easily I was able to grind the two pieces apart.

Don’t let the retaliative cleanliness of the suspension below fool you, I had to scrape away years of dirt and grease just to get it to the state it’s in here.


To find a particular page, use the search feature or index page.


6). Engine removal

Once the engine was ready to be removed, I took off the hood…

Then the upper cowl.

** Scene Missing **

Followed by the transmission.

At that point I built a wooden frame to attach an electric winch to and set it up over the car.

I was a bit nervous about this procedure, but to my surprise it worked out very well.

I removed the engine from the car, rolled the car back, then mounted the engine to the engine stand without any trouble.

Thanks to my neighbor for providing the engine stand. Little did he know that I would end up keeping it. – I’ve since given him a couple amplifiers for the stand, so we’re all good. 


To find a particular page, use the search feature or index page.


5). This is the beginning

In late August 2015, I decided it was the 240’s turn to get worked on and placed her on wooden jack stands to get a better view and more access to the underside of the car.

A little history on the car

So here’s the backstory on this Z. It’s a three owner car, me being the third and when I spoke to the first owner (the guy I bought it from provided me with his info) he mentioned that his wife had the car repainted white from its original lime green and had the interior reupholstered with cloth back in the 80’s. He made it sound as if this were a gift from his wife, but as I’ve found much later in this process, there was accident damage to at least the rear passengers side of the car and also damage to the front passengers side. More on this later. I believe this is what prompted the repaint.

And although he claims it was garage kept in California until arriving in Illinois in the mid 2000’s, the car eventually fell victim to rust. I’m assuming he had someone weld in reinforcing brackets and layers of steel over the rusted out weak spots. Which over the years rusted out even more. It was a mess.

After assessing the problem areas, I began removing all the ancillary pieces from the engine so it could be taken out.

In hindsight I would have approached this very differently. In my mind I thought I could address different portions of the car, one section at a time until complete. Between not completely knowing the severity of the issues I would find and the lack of experience I possessed, this has turned out to make much more work for myself than there needed to be.

If I had to do it over again, I would have disassembled the entire car, meticulously bagged and tagged all it’s parts and had it media blasted all at once, then went from there. I’m currently too far down the rabbit hole to turn back now, so it is what it is. You live, you learn.


To find a particular page, use the search feature or index page.


4). Clutch (not the band)

I had plans to work on the car beyond the basics, but wasn’t in a hurry. Aside from it being an old car that you had to drive a little differently than a modern vehicle, it was still the car of choice when I had to go somewhere. I would even choose the Z over my motorcycle fairly often, and for those who know me, that’s saying something.

Then around the spring of 2015, I was out running an errand when the clutch went out. I knew it was getting close, but I was still surprised when the clutch pedal just dropped to the floor. I managed to nurse it back home and parked it in my garage for the next few months.

And although she ran…

I had other things going on at that time and that’s how the car sat until later that year.


To find a particular page, use the search feature or index page.


3). Summer of 2014

Since she ran fine, I registered the Z and drove it back and forth to work, as planned. I experienced no mechanical issues that kept it from being reliable transportation and began doing minor upgrades like replacing the battery and adding a relay to be less taxing on the starter motor.

At one point I replaced the tie rod ends and took it to a local Nissan dealer to have the wheels aligned. This was fairly entertaining as no one there could figure out what specs to go by and it started to draw a crowd after a while.

During the next few months I would do little jobs on the car like paint the steering wheel, change the front brakes and replace the intake / exhaust gasket and manifold with headers.

I cleaned up the car the best I could and just enjoyed driving my own Z.

It was kind of weird at first because people would regularly honk, wave and yell out their windows at me… in my 40+ year old rust bucket of a Z. It was a fun summer.


To find a particular page, use the search feature or index page.


2). Picture pages

The next day I took the 240 to a nearby parking lot and took a few pictures. Here the extent of the rust starts to become apparent. You can also see that there was side molding removed from the doors. While other areas on the car seemed to look pretty good, like the spare tire well and most of the upper part of the car.

And while there is a great deal of rust on this car, and the more I would dig the more I found, what looked to be rust on the kicker panel of both sides of the car was really just the paint not sticking properly. It looked like they covered the kicker panels in a textured undercoating of some sort and it affected the top coat negatively.


To find a particular page, use the search feature or index page.